How to Compress PNG Files on Mac With Visually Lossless Results
Learn how to compress PNG files and reduce PNG size on Mac with Zipic. Covers lossy quantization with visually lossless results, batch processing, and when to convert PNG to WebP or AVIF.
PNG files preserve every pixel perfectly — which is exactly why they’re so large. A single screenshot can weigh 2–5 MB, and a folder of UI assets can easily exceed 100 MB. If you need to compress PNG files on your Mac without destroying the sharp edges and transparency that make PNG useful in the first place, you need the right tool and the right approach.
This guide shows you how to reduce PNG size with Zipic’s smart lossy compression that delivers visually lossless results, how to batch process hundreds of PNG files at once, and when converting to another format makes more sense than compressing PNG at all.
For a broader look at all image compression methods on Mac, see How to Compress Images on Mac — The Complete Guide.
Why PNG Files Are So Large
PNG uses lossless compression — it reconstructs every single pixel exactly as it was. That’s perfect for screenshots, UI elements, logos, and anything with text or sharp edges. But lossless compression can’t achieve the same file sizes as lossy formats like JPEG or WebP.
Here’s how a typical 1920×1080 screenshot compares across formats at equivalent visual quality:
| Format | Compression Type | Typical File Size | vs PNG |
|---|---|---|---|
| PNG | Lossless | ~1.8 MB | Baseline |
| PNG (optimized) | Lossless (re-encoded) | ~1.3 MB | 28% smaller |
| PNG (quantized) | Lossy (8-bit palette) | ~450 KB | 75% smaller |
| WebP (lossless) | Lossless | ~1.1 MB | 39% smaller |
| WebP (lossy) | Lossy | ~160 KB | 91% smaller |
The gap is significant. An optimized PNG is still 8x larger than a lossy WebP at equivalent perceived quality. But PNG remains essential for specific use cases where pixel-perfect accuracy matters — the goal is to make those PNG files as small as possible within the lossless constraint, or to apply carefully tuned lossy compression when appropriate.
How PNG Compression Works
PNG compression has two distinct approaches, and understanding the difference helps you choose the right settings:
Lossless Optimization
Every PNG file uses DEFLATE compression internally, but most software doesn’t use the most aggressive DEFLATE settings when saving PNG files. Lossless PNG optimization re-encodes the file using better filter strategies and stronger DEFLATE parameters. The result: 10–30% smaller files with zero quality loss — every pixel is bit-for-bit identical.
This is what tools like oxipng do: they try every combination of PNG filters and compression windows to find the smallest possible encoding of the same pixel data.
Lossy Quantization
For larger savings, lossy PNG compression reduces the color palette. A typical PNG stores millions of colors (32-bit RGBA). Lossy quantization reduces this to 256 colors (8-bit) using sophisticated algorithms that minimize visible quality loss. The result: 40–70% smaller files with minimal perceptible difference, especially effective for screenshots, UI graphics, and illustrations that don’t use continuous photographic gradients.
At high quality settings (80%+), the difference is nearly invisible on most content types. For photography, lossy PNG compression is less effective — that’s where JPEG, WebP, or AVIF are better choices.
For more on how lossy and lossless compression differ, see Lossy vs Lossless Compression Explained.
How to Compress PNG Files on Mac with Zipic
Zipic uses a preset-based workflow: configure your compression settings first, then add images — compression starts automatically. No “start” button needed.
Step 1: Choose a Compression Preset
Click the Compression Settings button at the bottom-left of Zipic’s main window to open the preset selector:
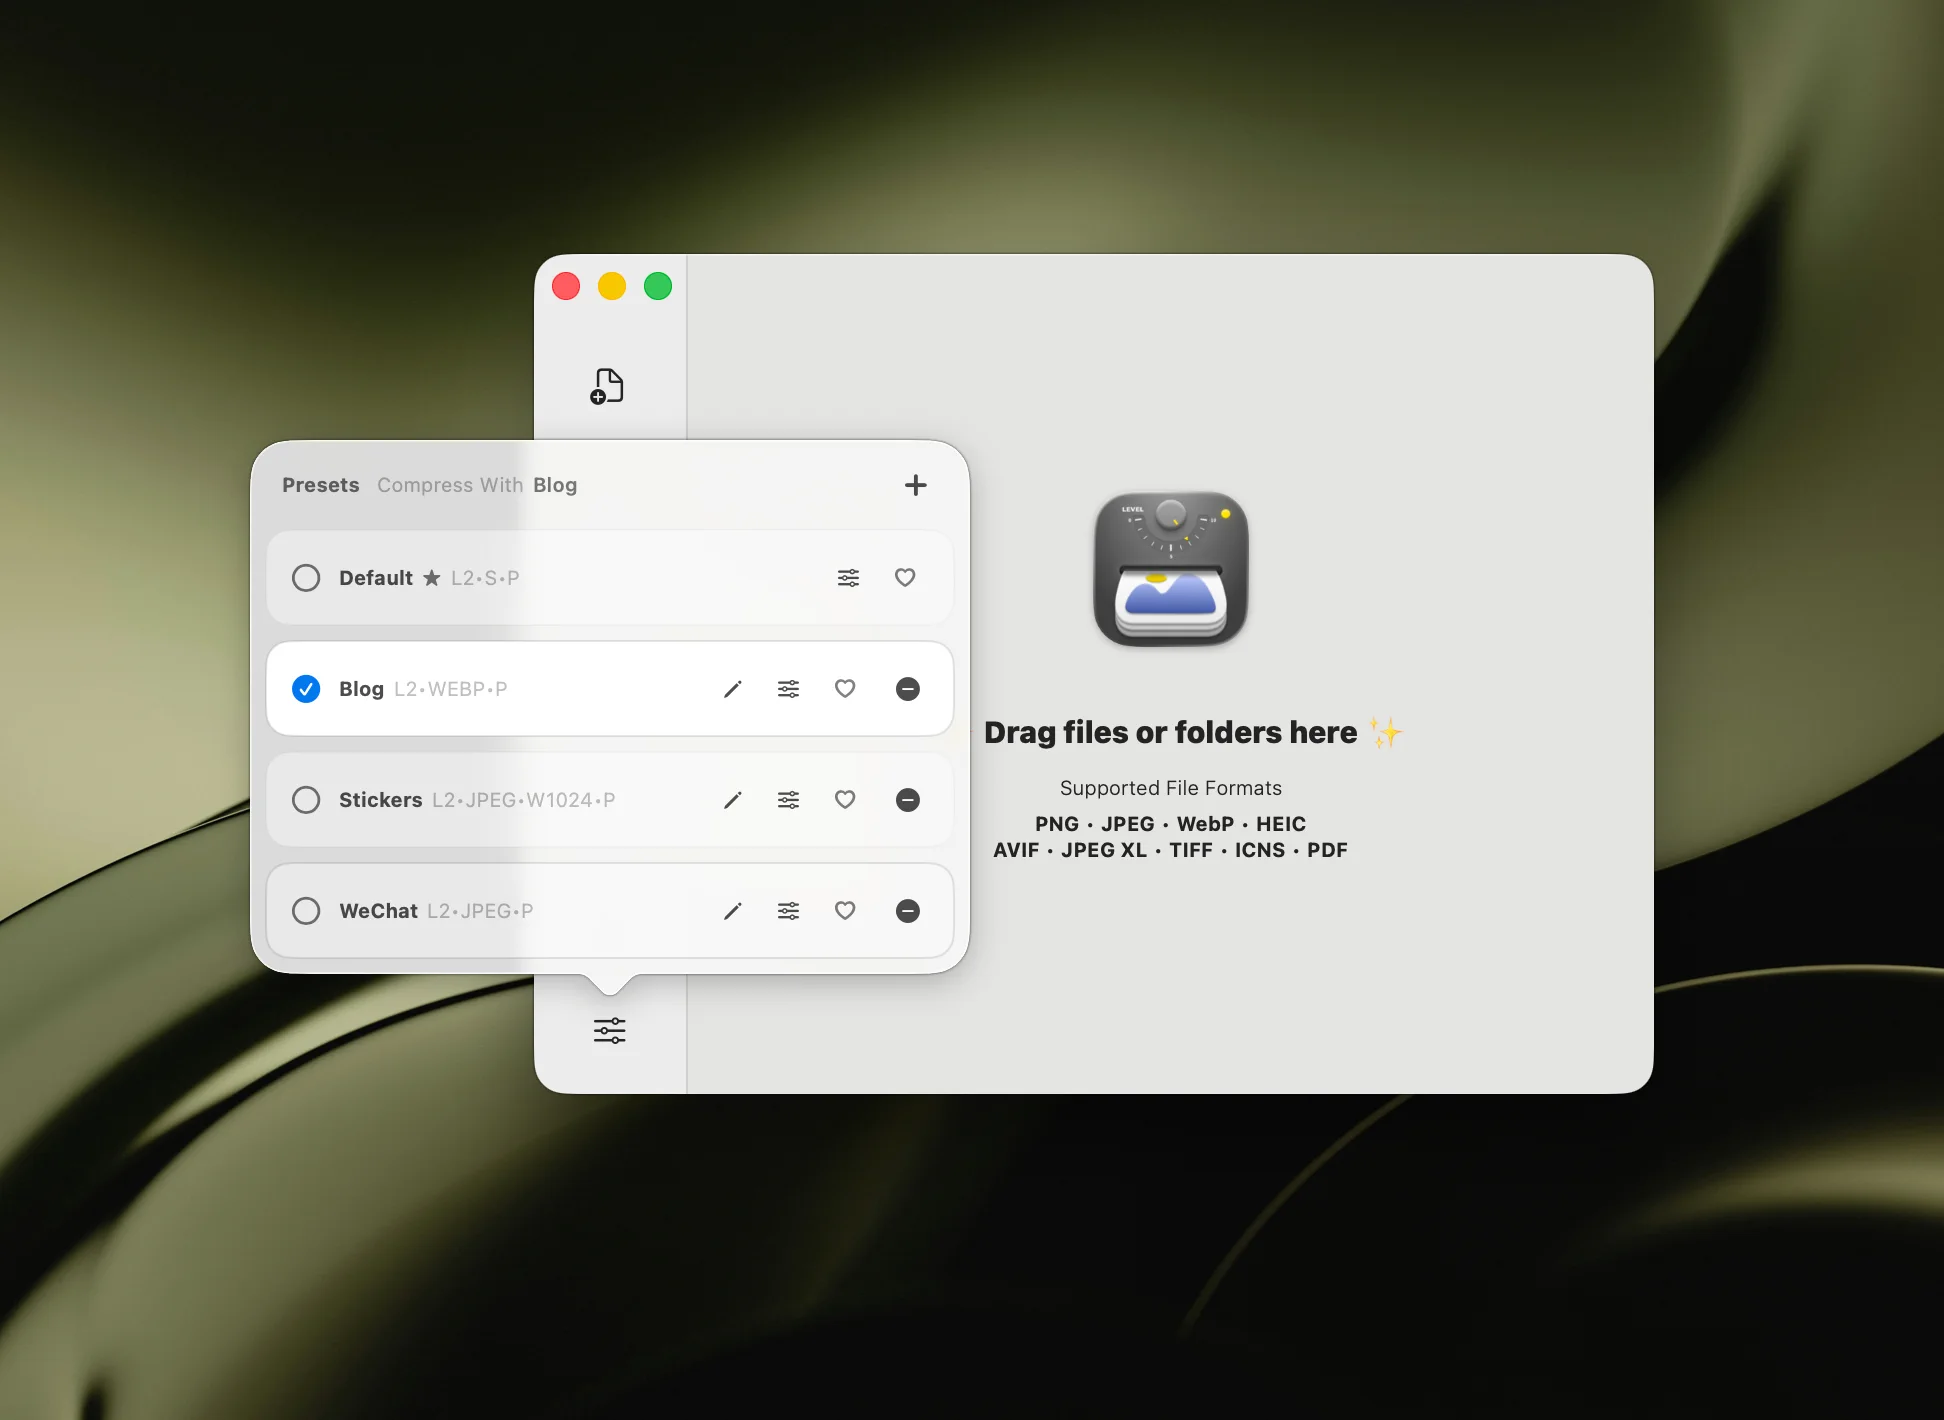
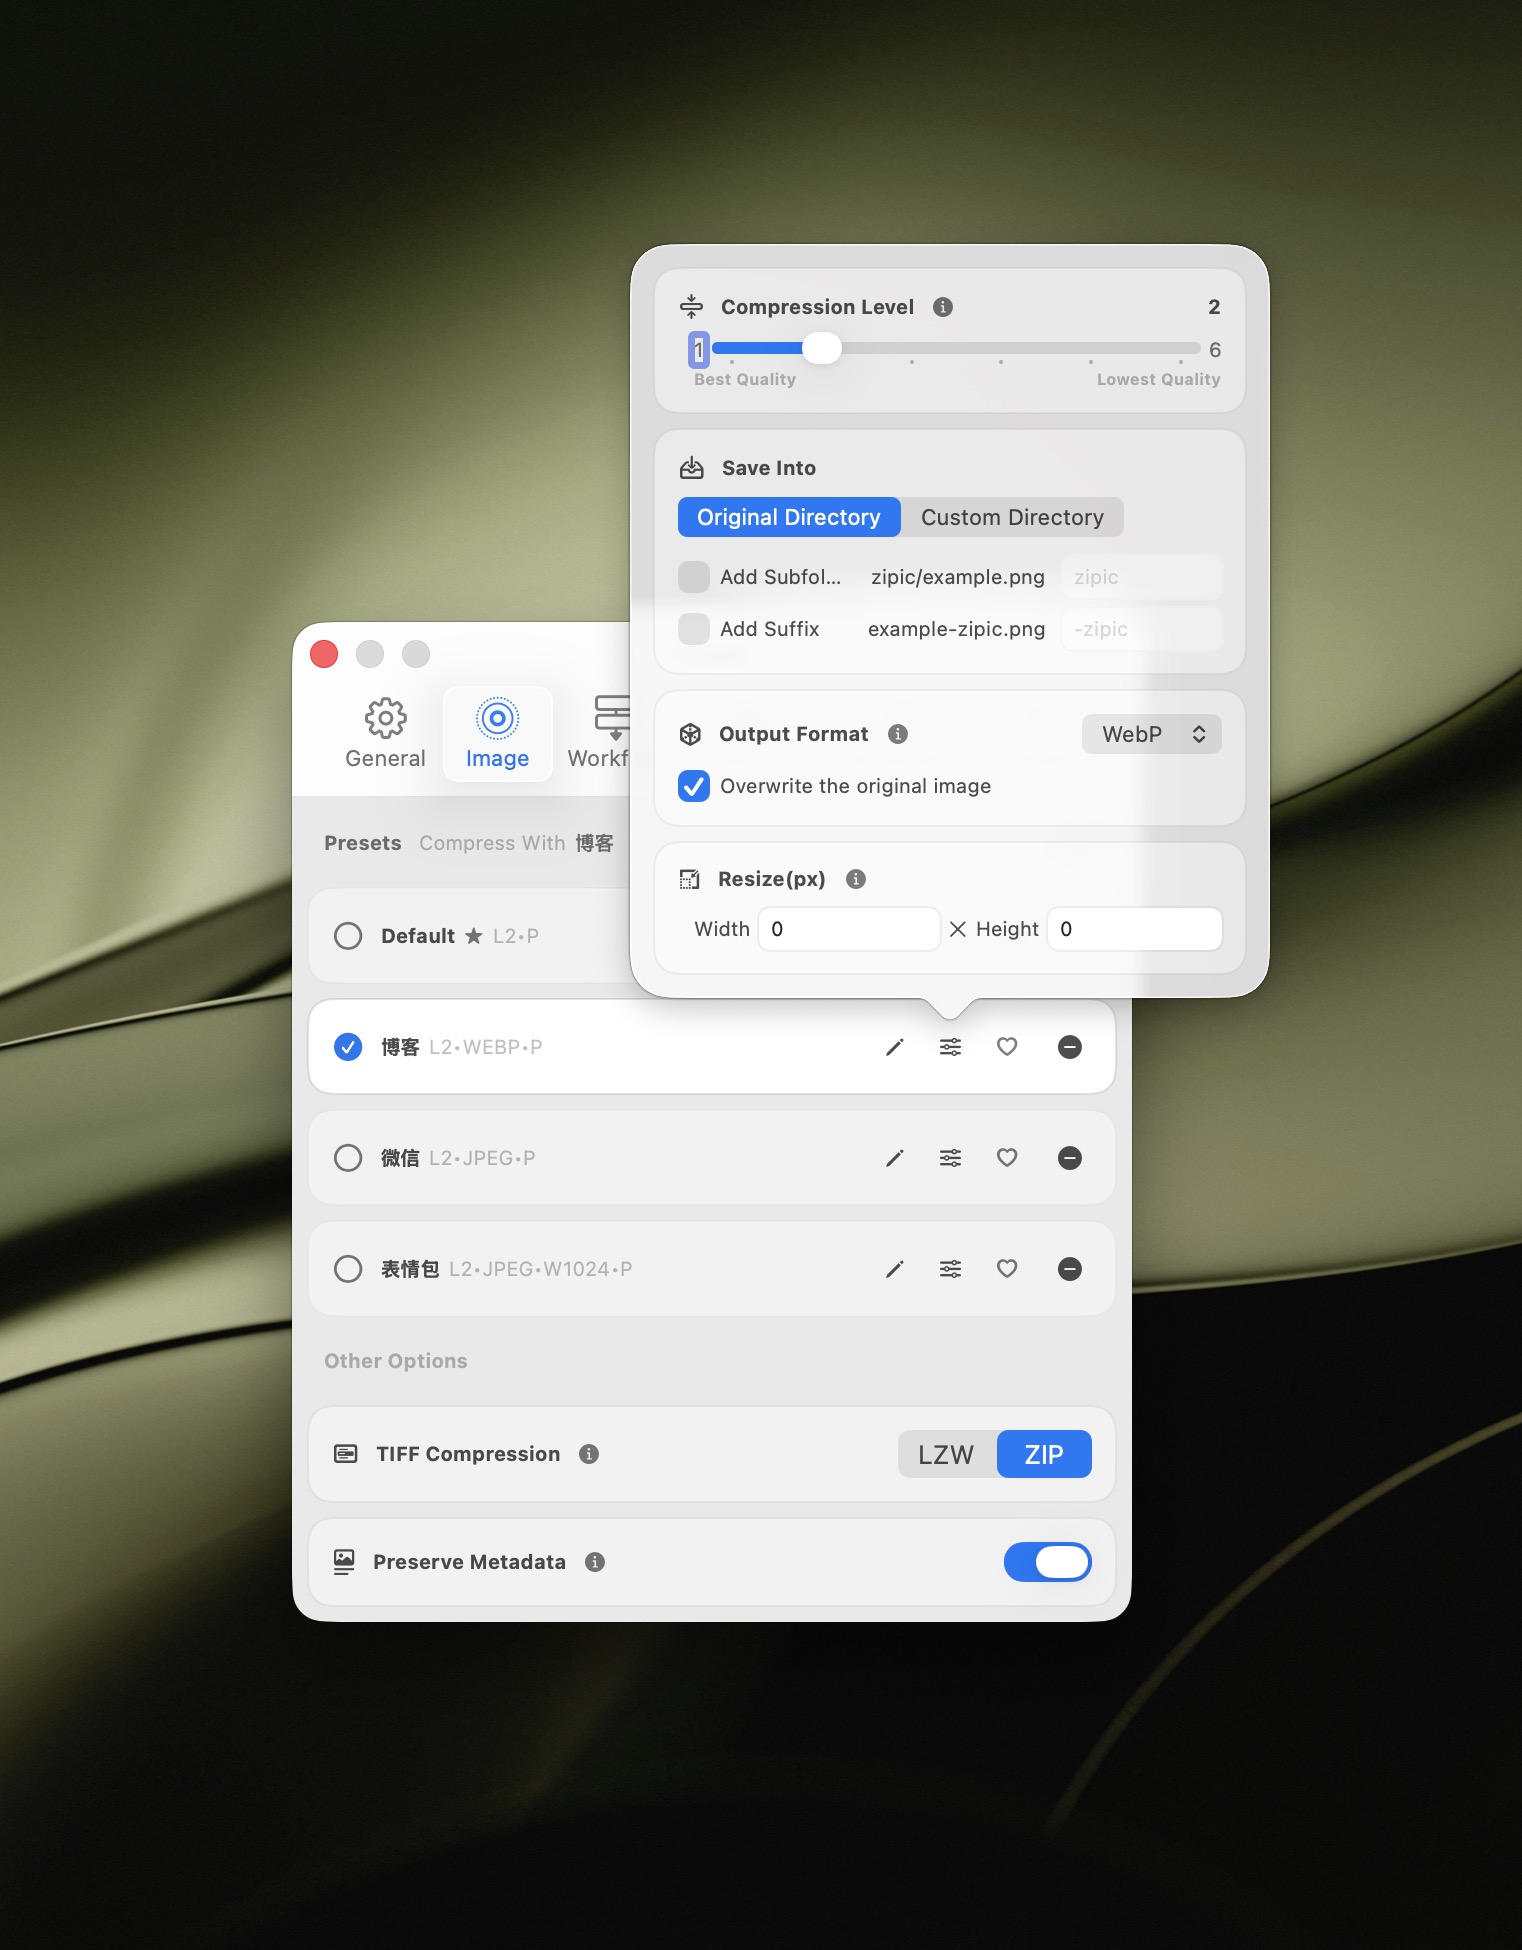
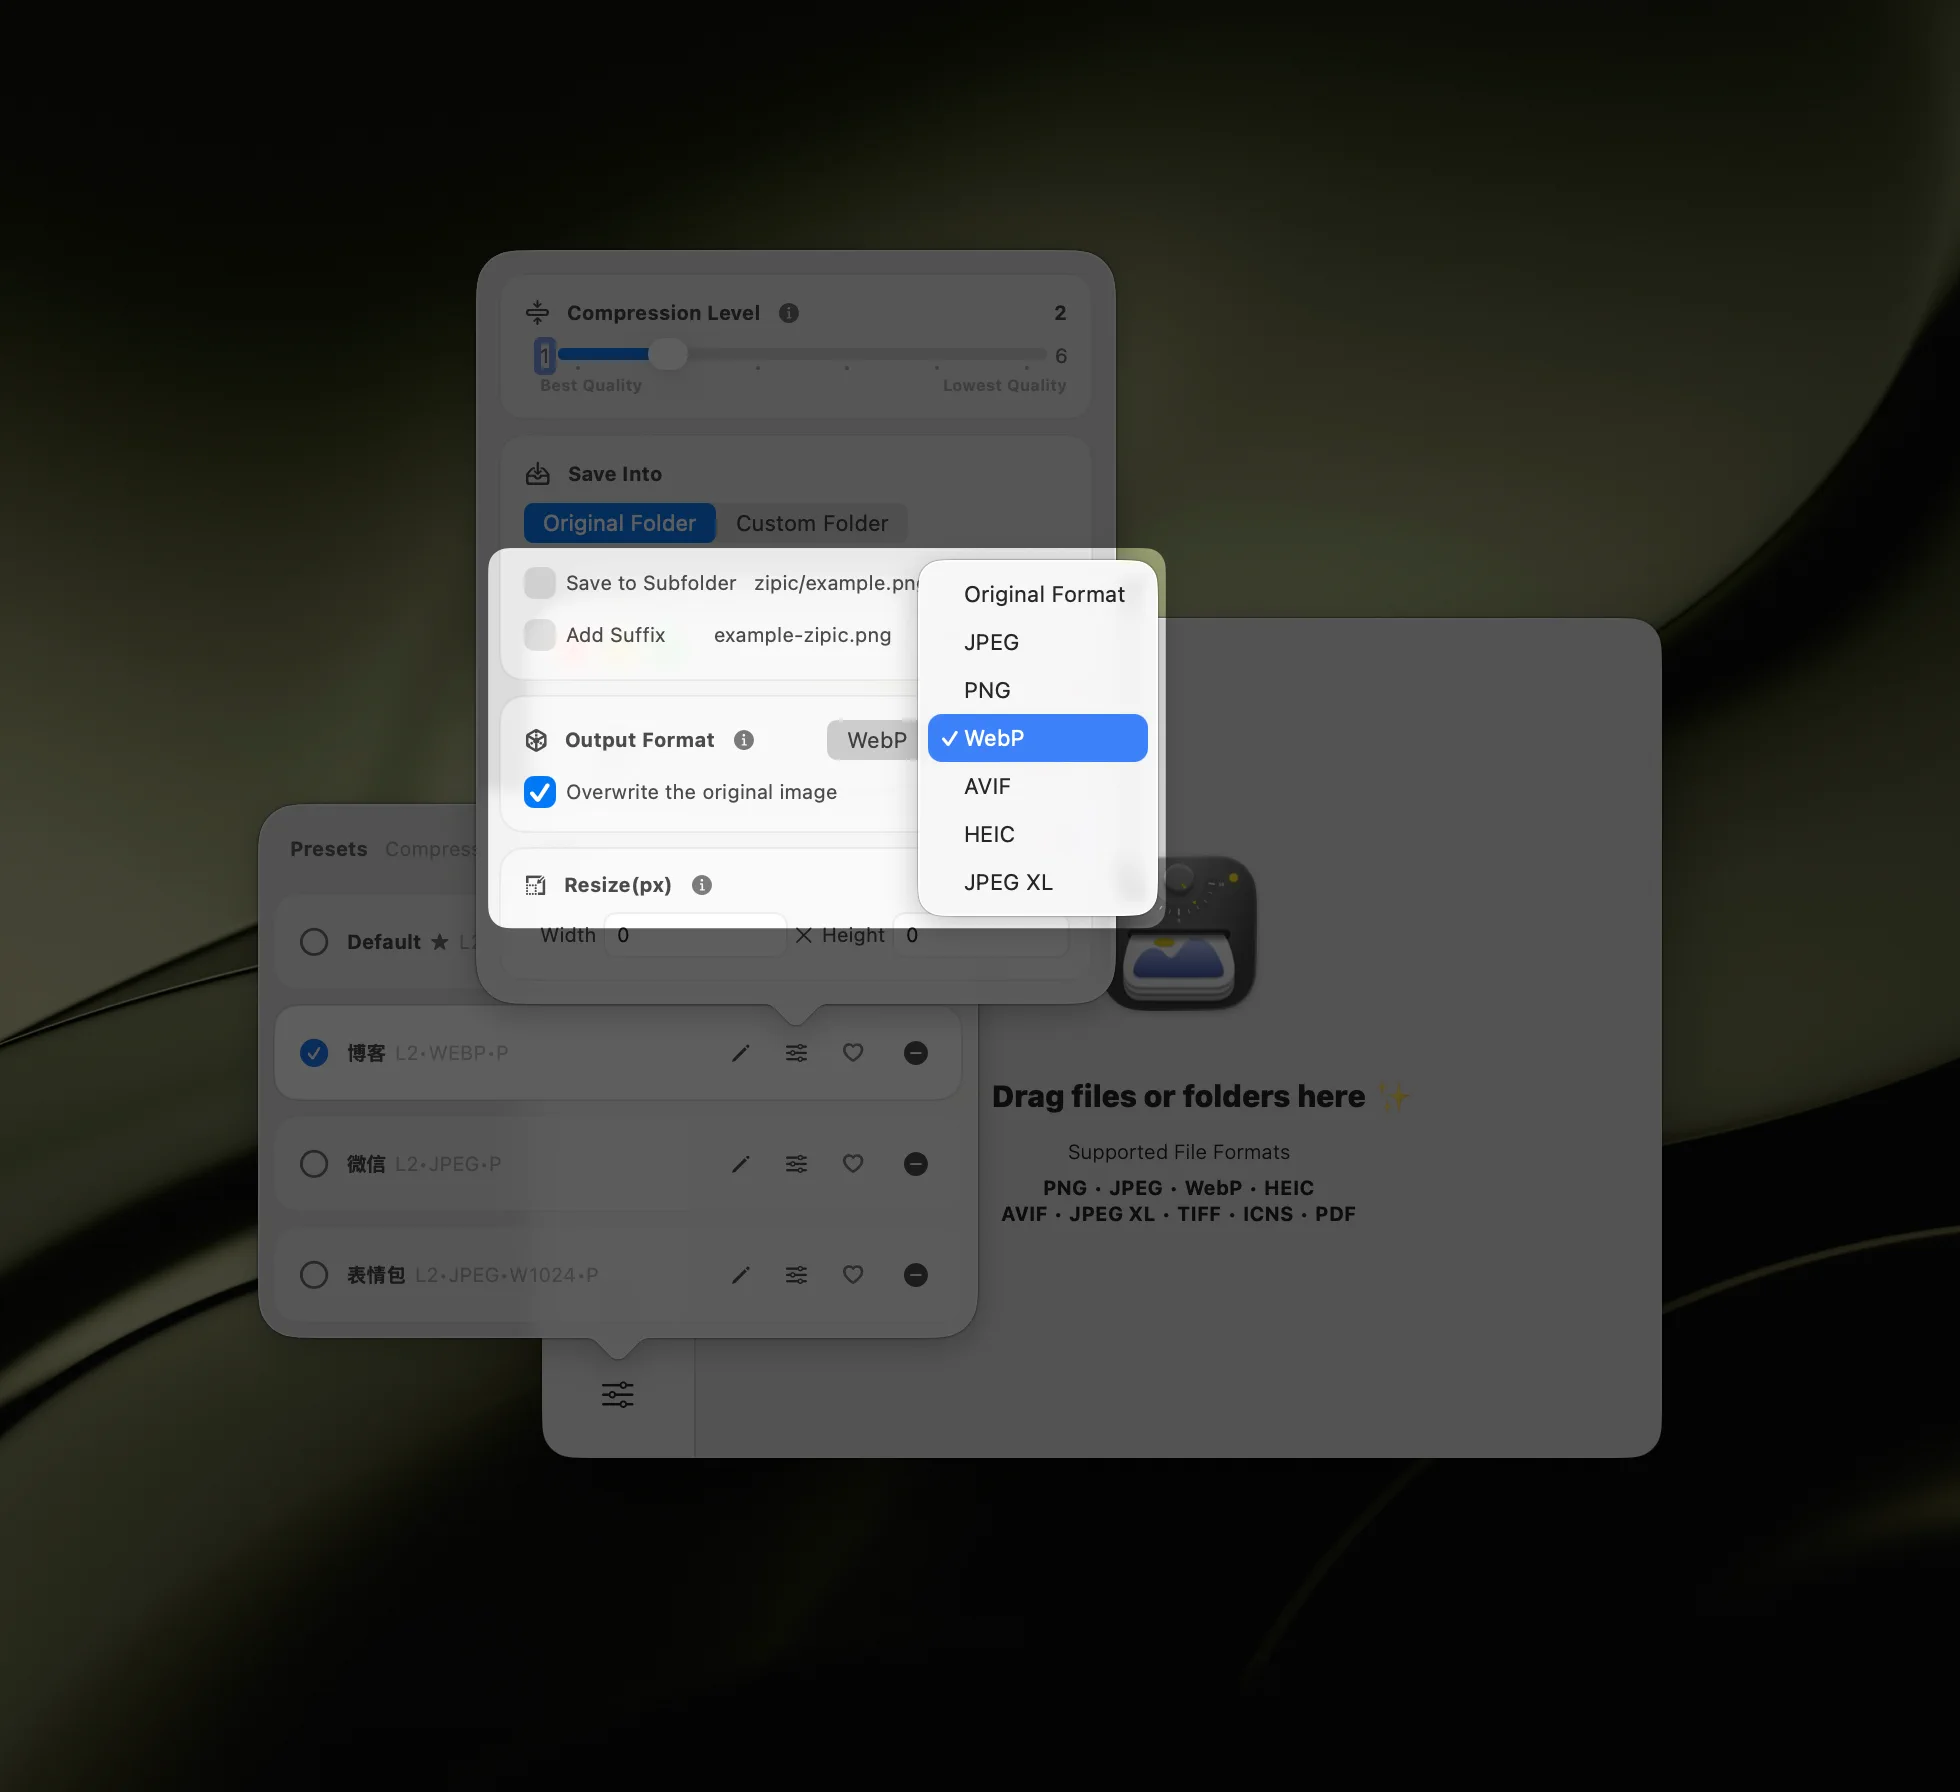
Create a new preset or edit an existing one. In the preset editor, configure:
- Compression Level — choose from 6 levels (Level 2–3 recommended for PNG; balances size reduction and quality)
- Save Format — keep as “Original” to output PNG, or select WebP/AVIF to convert during compression
- Save Location — replace original, save to subfolder, or pick a custom directory
- Resize — optionally set maximum dimensions
Compression level guide for PNG:
| Level | Reduction | Best For |
|---|---|---|
| Level 1 | ~15–25% | Archival, pixel-critical assets |
| Level 2–3 | ~30–50% | Screenshots, UI assets, general use |
| Level 4 | ~50–65% | Blog images, documentation |
| Level 5–6 | ~65–80% | Thumbnails, email, bandwidth-constrained delivery |
All levels use lossy quantization — Zipic is not a lossless compressor. At levels 1–2, the visual difference from the original is virtually imperceptible (visually lossless). Higher levels apply more aggressive quantization for larger savings with a visible quality trade-off. For detailed preset configuration, see the Image Compression Basic guide.
Step 2: Add PNG Files
With your preset selected, add images and Zipic compresses them immediately. The simplest method is drag and drop:
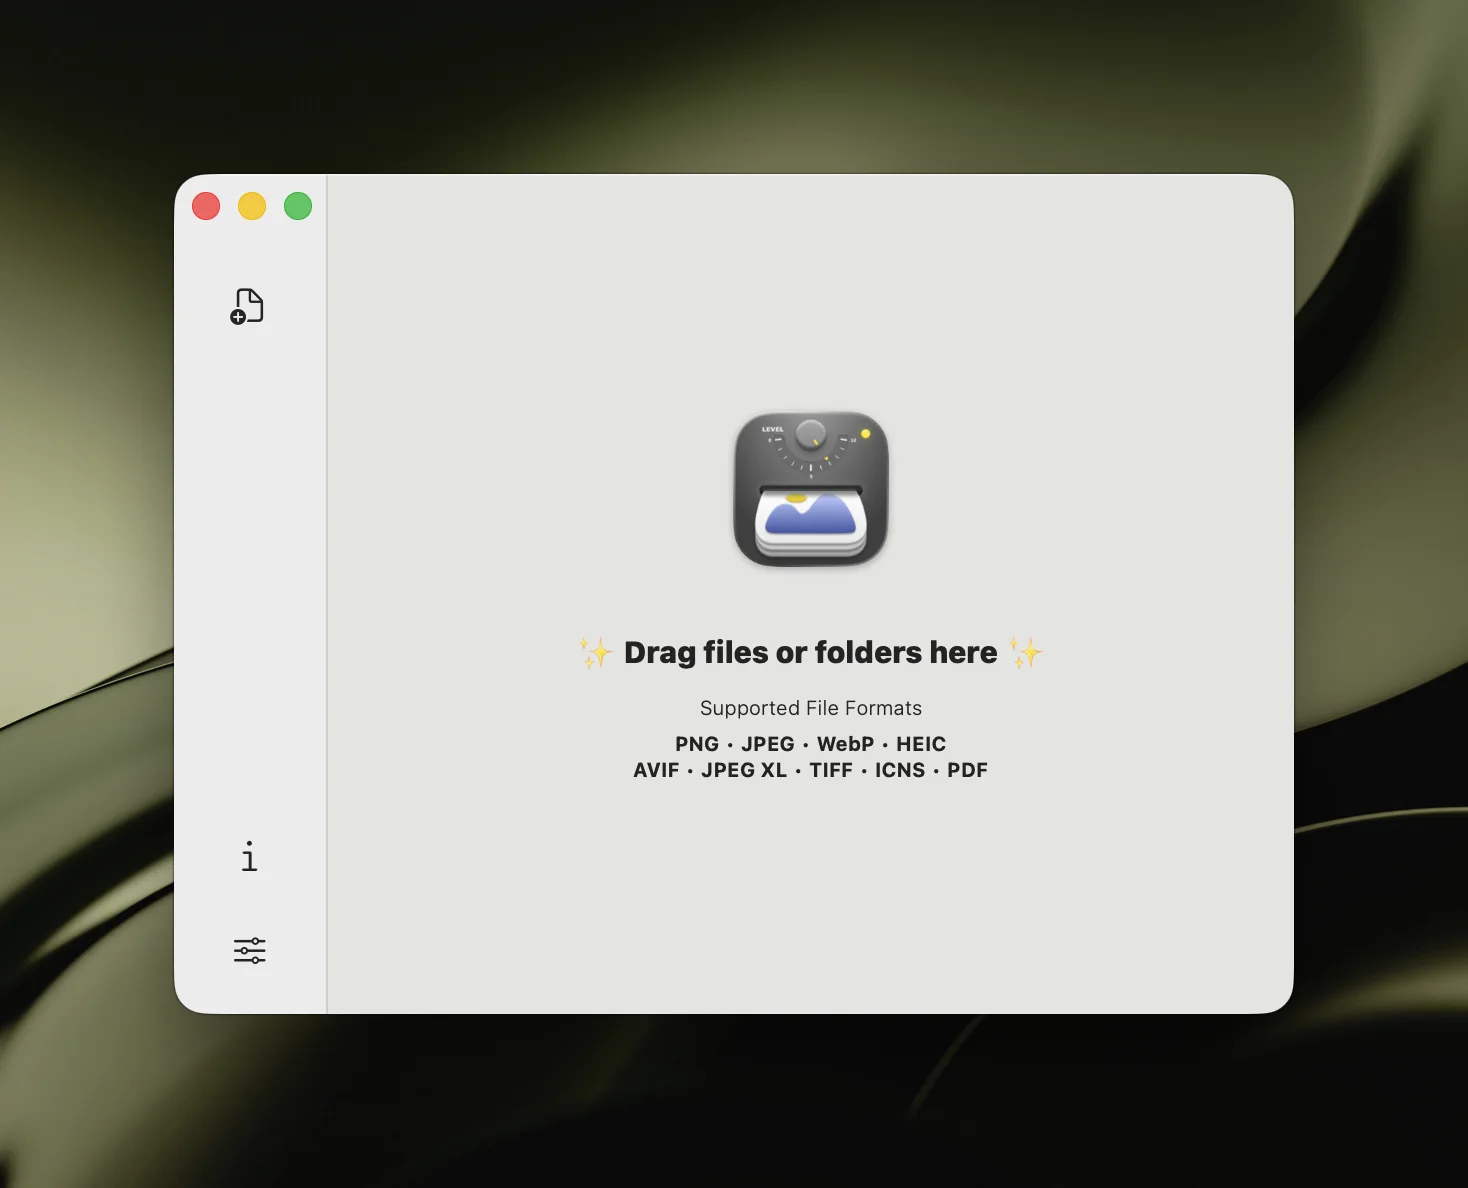
Zipic accepts PNG and 11 other formats as input. You can also add files via:
- Raycast Extension — compress from the Raycast command palette
- Notch Drop (Pro) — drag files to the screen notch for instant compression
- Paste Compression (Pro) — copy an image, press
⌘+Vin Zipic - Finder Context Menu — right-click → Open With → Zipic
- Folder Monitoring (Pro) — auto-compress every new PNG added to a watched folder
Step 3: Review Results
Results appear in the history list showing original and compressed file sizes. Click any thumbnail to open the comparison preview (Pro) — zoom, pan, and adjust compression strength in real time without restarting the process.
If the compression is too aggressive, dial back the level; if you want more savings, increase it. The preview window lets you fine-tune without re-adding files.
Batch Compress PNG Files
PNG compression is most impactful at scale. Compressing one screenshot saves a few hundred KB; compressing an entire design system or screenshot library saves hundreds of megabytes.
Zipic handles batch PNG compression natively:
- Drag folders — drop an entire directory and Zipic processes every PNG inside (including subdirectories)
- Multiple selections — select dozens of files in Finder and drag them all at once
- Folder monitoring (Pro) — watch a screenshot folder, design export directory, or download folder and auto-compress every new PNG on arrival
For a complete batch processing walkthrough, see Batch Compress Images on Mac: Complete Tutorial.
PNG Compression Tips for Best Results
Start with Level 2–3. This range gives the best balance of size reduction and quality for most PNG content. Only go higher for non-critical images like thumbnails or email assets.
Keep PNG for screenshots and UI. PNG excels at content with sharp edges, text, and flat colors. If you’re compressing photographs stored as PNG (a common mistake), convert to WebP or AVIF instead — you’ll get 80%+ size reduction with barely visible quality difference.
Use “Original” save format to stay PNG. When you need the output to remain PNG (for compatibility or transparency requirements), make sure the save format is set to “Original” rather than a conversion target.
Compress at the source. If your design tool exports unoptimized PNG files, compress them immediately after export rather than after they’ve been uploaded or distributed. Zipic’s folder monitoring can automate this — watch your design export folder and every new PNG gets compressed automatically.
Check the comparison preview for critical assets. For assets where pixel accuracy matters (UI components, icons), use Zipic Pro’s comparison preview to verify that the compressed version meets your standards before committing.
When to Convert PNG to Other Formats
Sometimes the best way to reduce PNG file size is to not use PNG at all. Here’s when converting makes more sense:
| Scenario | Keep PNG? | Convert To | Why |
|---|---|---|---|
| Screenshots for docs | Yes | — | Pixel-perfect text rendering |
| UI components / icons | Yes | — | Sharp edges, transparency |
| Logos with transparency | Yes (or SVG) | — | Clean edges at any size |
| Blog post photos | No | WebP or AVIF | 80%+ smaller, imperceptible difference |
| Social media uploads | No | JPEG | Platform re-encodes anyway |
| Web page hero images | No | WebP (AVIF fallback) | Much smaller, 97%+ browser support |
| Photo archives | No | JPEG or HEIC | PNG is overkill for photos |
Zipic converts during compression — set the target format in your preset and conversion happens automatically:
For a detailed format selection guide, see How to Choose the Right Image Format for Your Project and the Choosing Image Formats documentation.
Get Started
Zipic compresses PNG files with 6 quality levels, batch processing, and one-click format conversion — all in a native macOS app optimized for Apple Silicon.
- Download Zipic
- Set your compression level and save format in the preset
- Drag your PNG files in — compression starts automatically
For comparison preview, folder monitoring, Notch Drop compression, and unlimited presets, upgrade to Zipic Pro.
Related Articles
- JPEG vs PNG vs WebP: Which Image Format Should You Use?
- Lossy vs Lossless Compression Explained
- How to Compress Images on Mac — The Complete Guide
- Batch Compress Images on Mac: Complete Tutorial
- Optimize Images for Web Performance
- How to Choose the Right Image Format for Your Project
For the complete compression settings guide, visit docs.zipic.app.