How to Reduce JPEG File Size Without Losing Quality
Learn 5 proven methods to reduce JPEG file size on Mac without visible quality loss. Adjust compression levels, resize, compare previews, and batch process with Zipic.
JPEG is the most widely used image format on the web and in personal photo libraries — but JPEG files are often far larger than they need to be. A single photo from a modern iPhone can be 5–10 MB, and DSLR images easily reach 20 MB+. Multiply that by hundreds of images and you’re looking at slow page loads, bloated email attachments, and storage that fills up fast.
The good news: you can reduce JPEG file size dramatically — often by 50–70% — without any visible quality loss. This guide covers five practical methods using Zipic, a native macOS image compression app, along with the technical background to help you make informed decisions.
What Makes JPEG Files Large?
Before diving into solutions, it helps to understand what drives JPEG file size:
- Resolution (pixel count) — A 4000×3000 photo contains 12 million pixels. More pixels means more data to encode, even after compression.
- Quality setting — JPEG quality is typically measured on a 0–100 scale. Files saved at quality 95+ are nearly indistinguishable from the original but can be 3–5× larger than the same image at quality 80.
- Embedded metadata — EXIF data (camera model, GPS coordinates, timestamps), ICC color profiles, and embedded thumbnails can add 50–200 KB per file.
- Chroma subsampling — JPEG exploits the fact that human vision is more sensitive to brightness than color. How aggressively color data is reduced affects both file size and quality.
The optimal balance point for web delivery is quality 75–85, which typically achieves 55–70% file size reduction with no perceptible quality difference at normal viewing distances.
Method 1: Adjust Compression Level in Zipic
The most direct way to reduce JPEG file size is adjusting the compression level. Zipic offers a preset-based workflow — configure your settings once, then compress any number of images automatically.
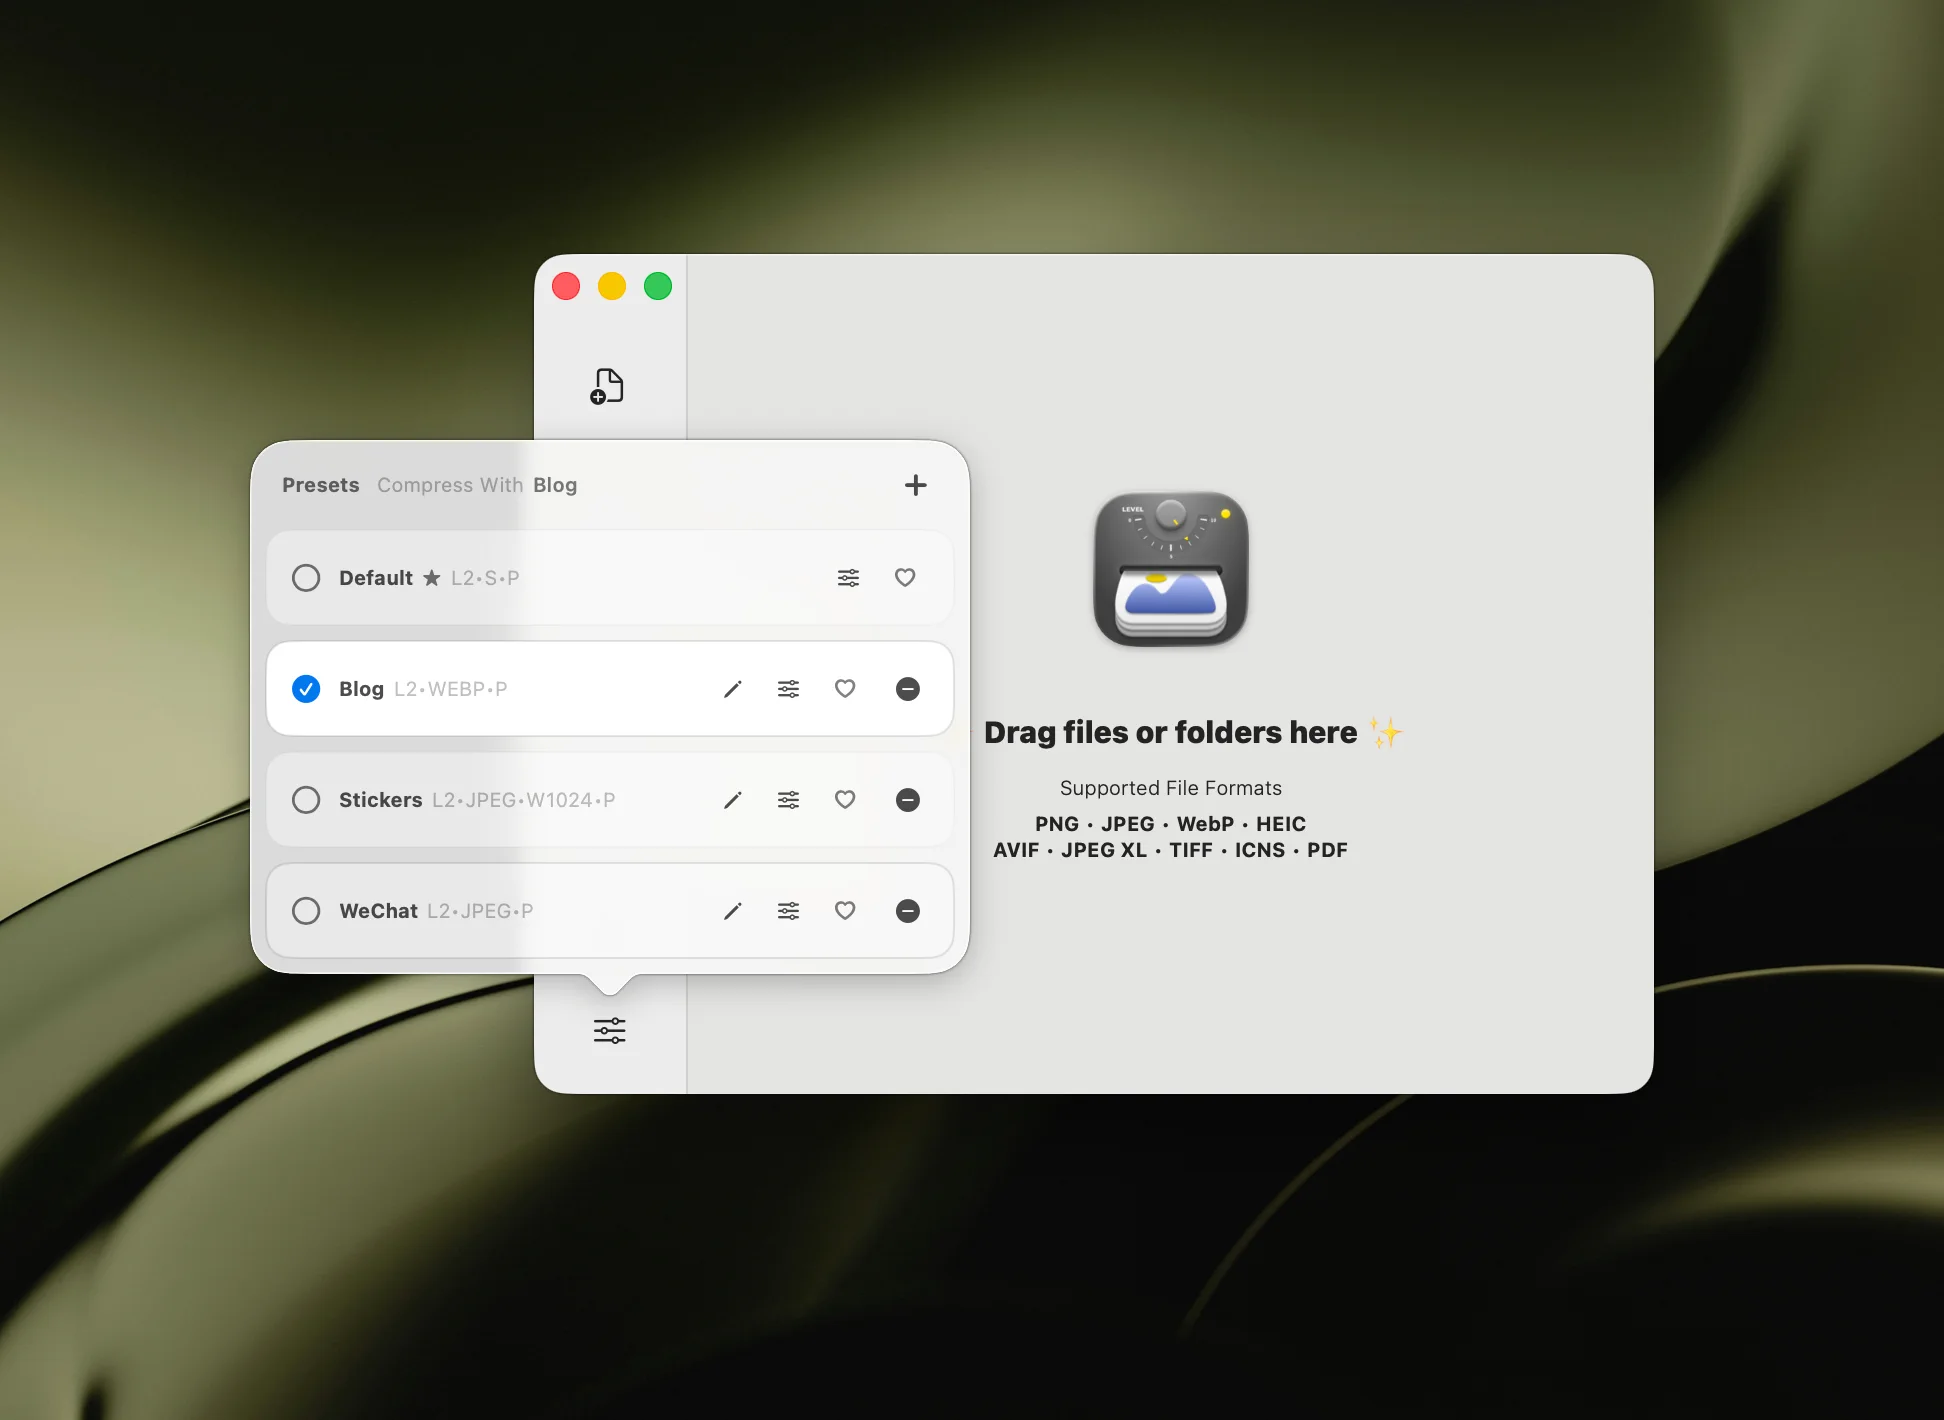
Click the Compression Settings button at the bottom-left of Zipic’s main window to open the preset popup:
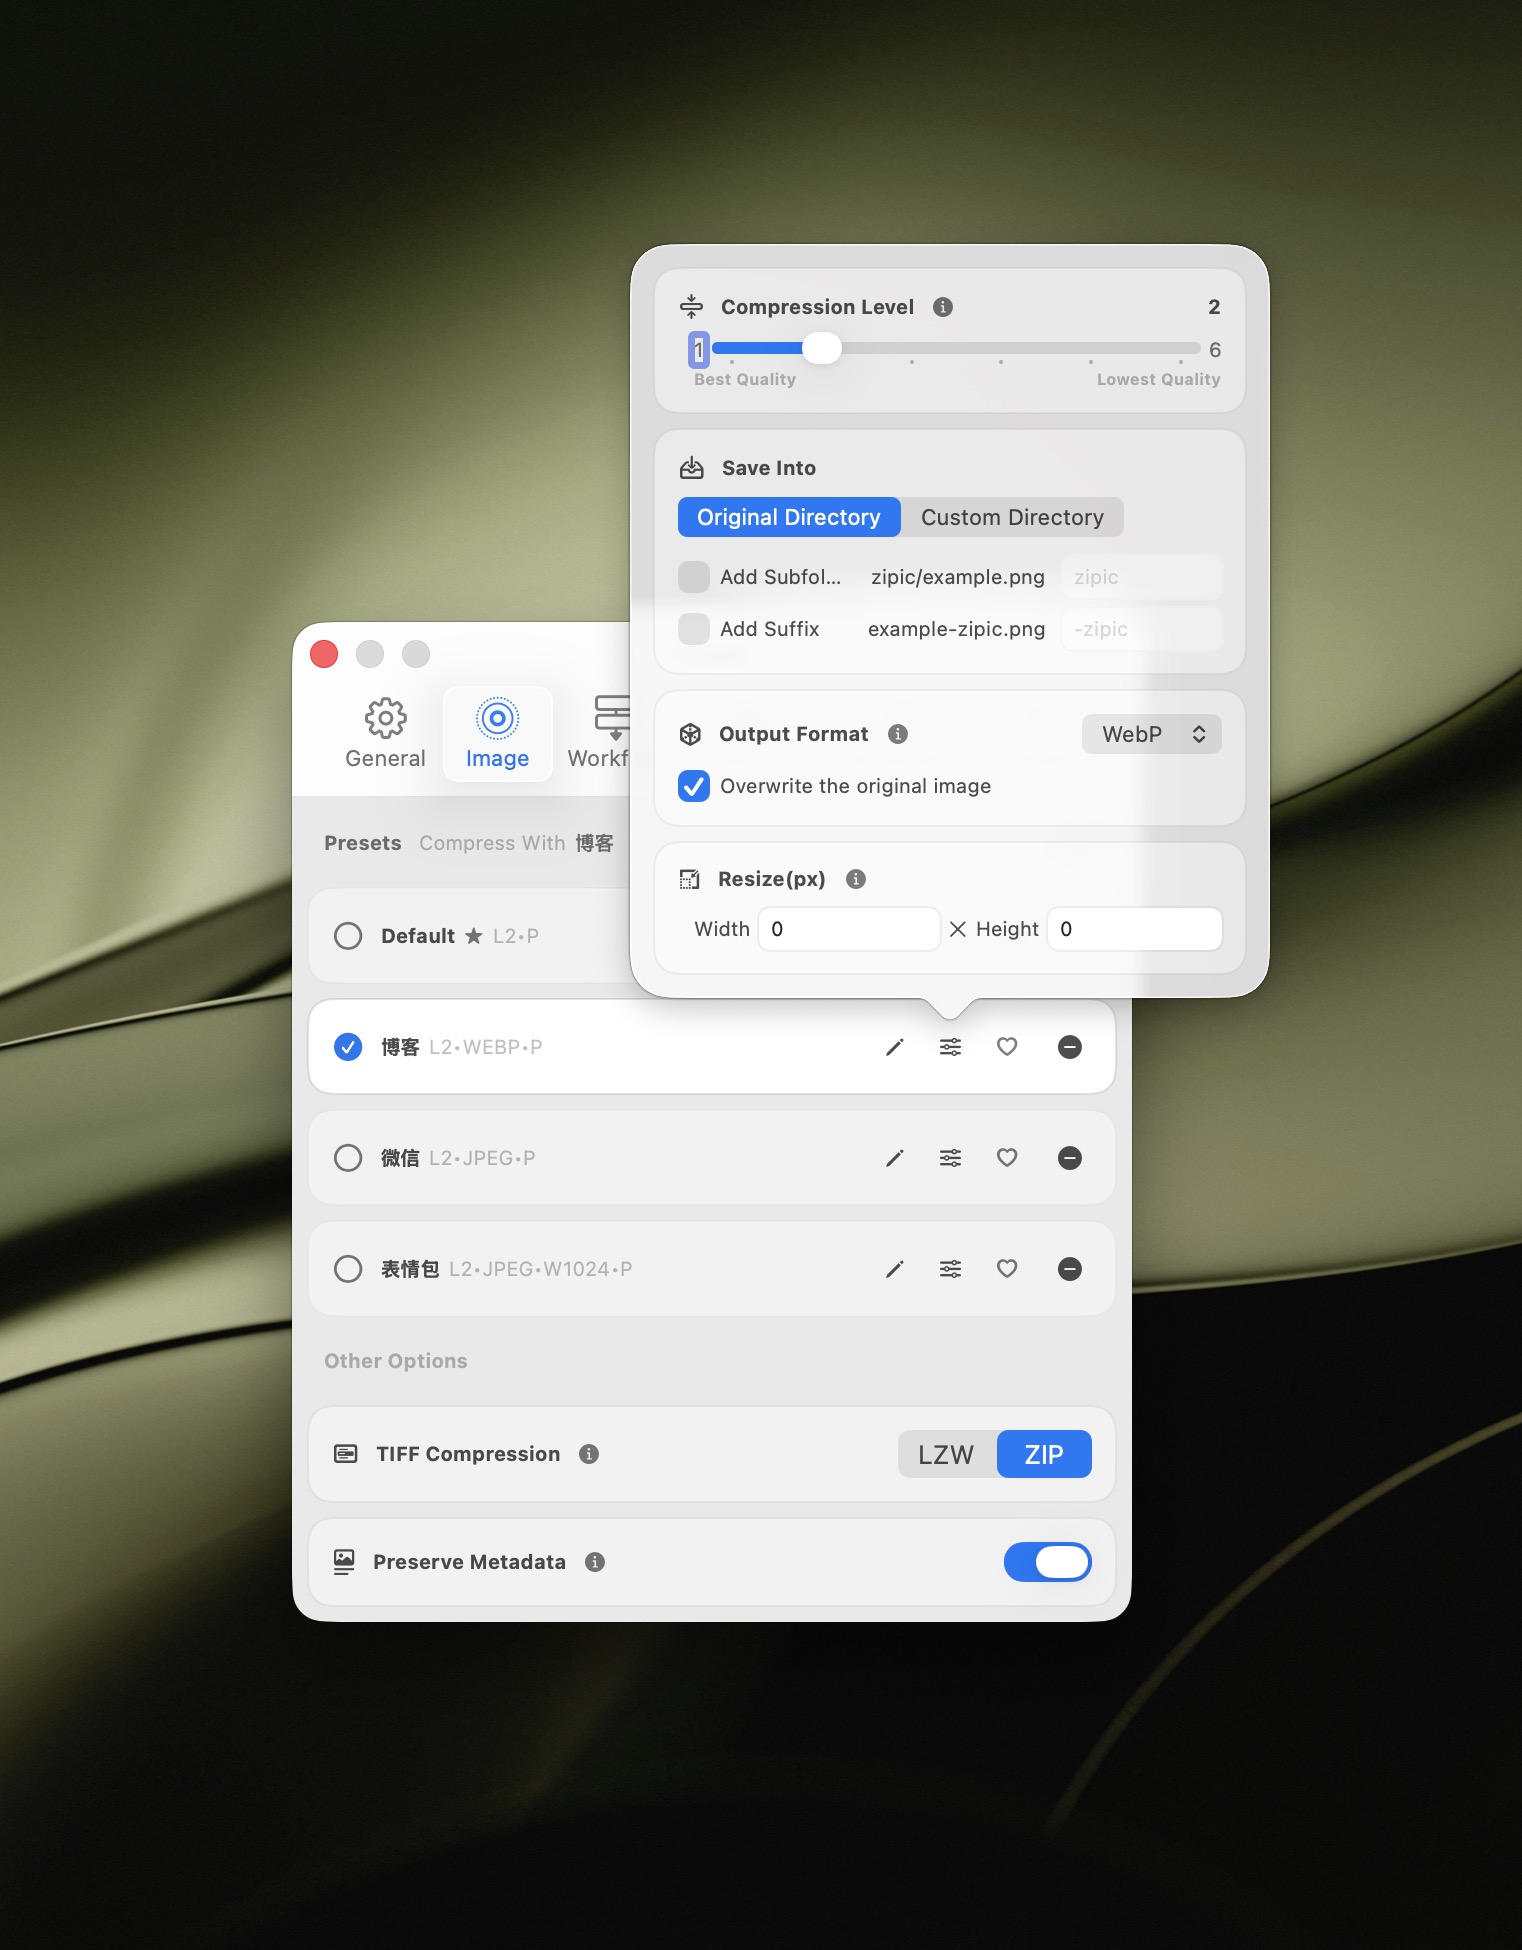
Create a new preset or edit an existing one. The preset editing popup lets you configure compression level, save location, output format, and resize options:
Compression level recommendations for JPEG:
| Zipic Level | Equivalent Quality | Typical Reduction | Best For |
|---|---|---|---|
| Level 1 | ~90–95 | ~20–30% | Archival, print-quality photos |
| Level 2–3 | ~75–85 | ~50–70% | Web images, social media, email |
| Level 4–5 | ~50–70 | ~70–85% | Thumbnails, previews, placeholders |
Start with Level 2 or 3. This range delivers the best balance of quality and file size for the vast majority of use cases. You can always fine-tune from there.
After selecting your preset, drag JPEG files or entire folders into the Zipic main window — compression starts automatically, no “start” button needed.
For the full guide on presets and compression methods, see the Image Compression Basic documentation.
Method 2: Resize Before Compressing
One of the most overlooked ways to reduce JPEG file size is resizing images to their actual display dimensions. A 4000×3000 photo displayed at 800px wide on a website wastes 80% of its pixels — and all the bytes encoding them.
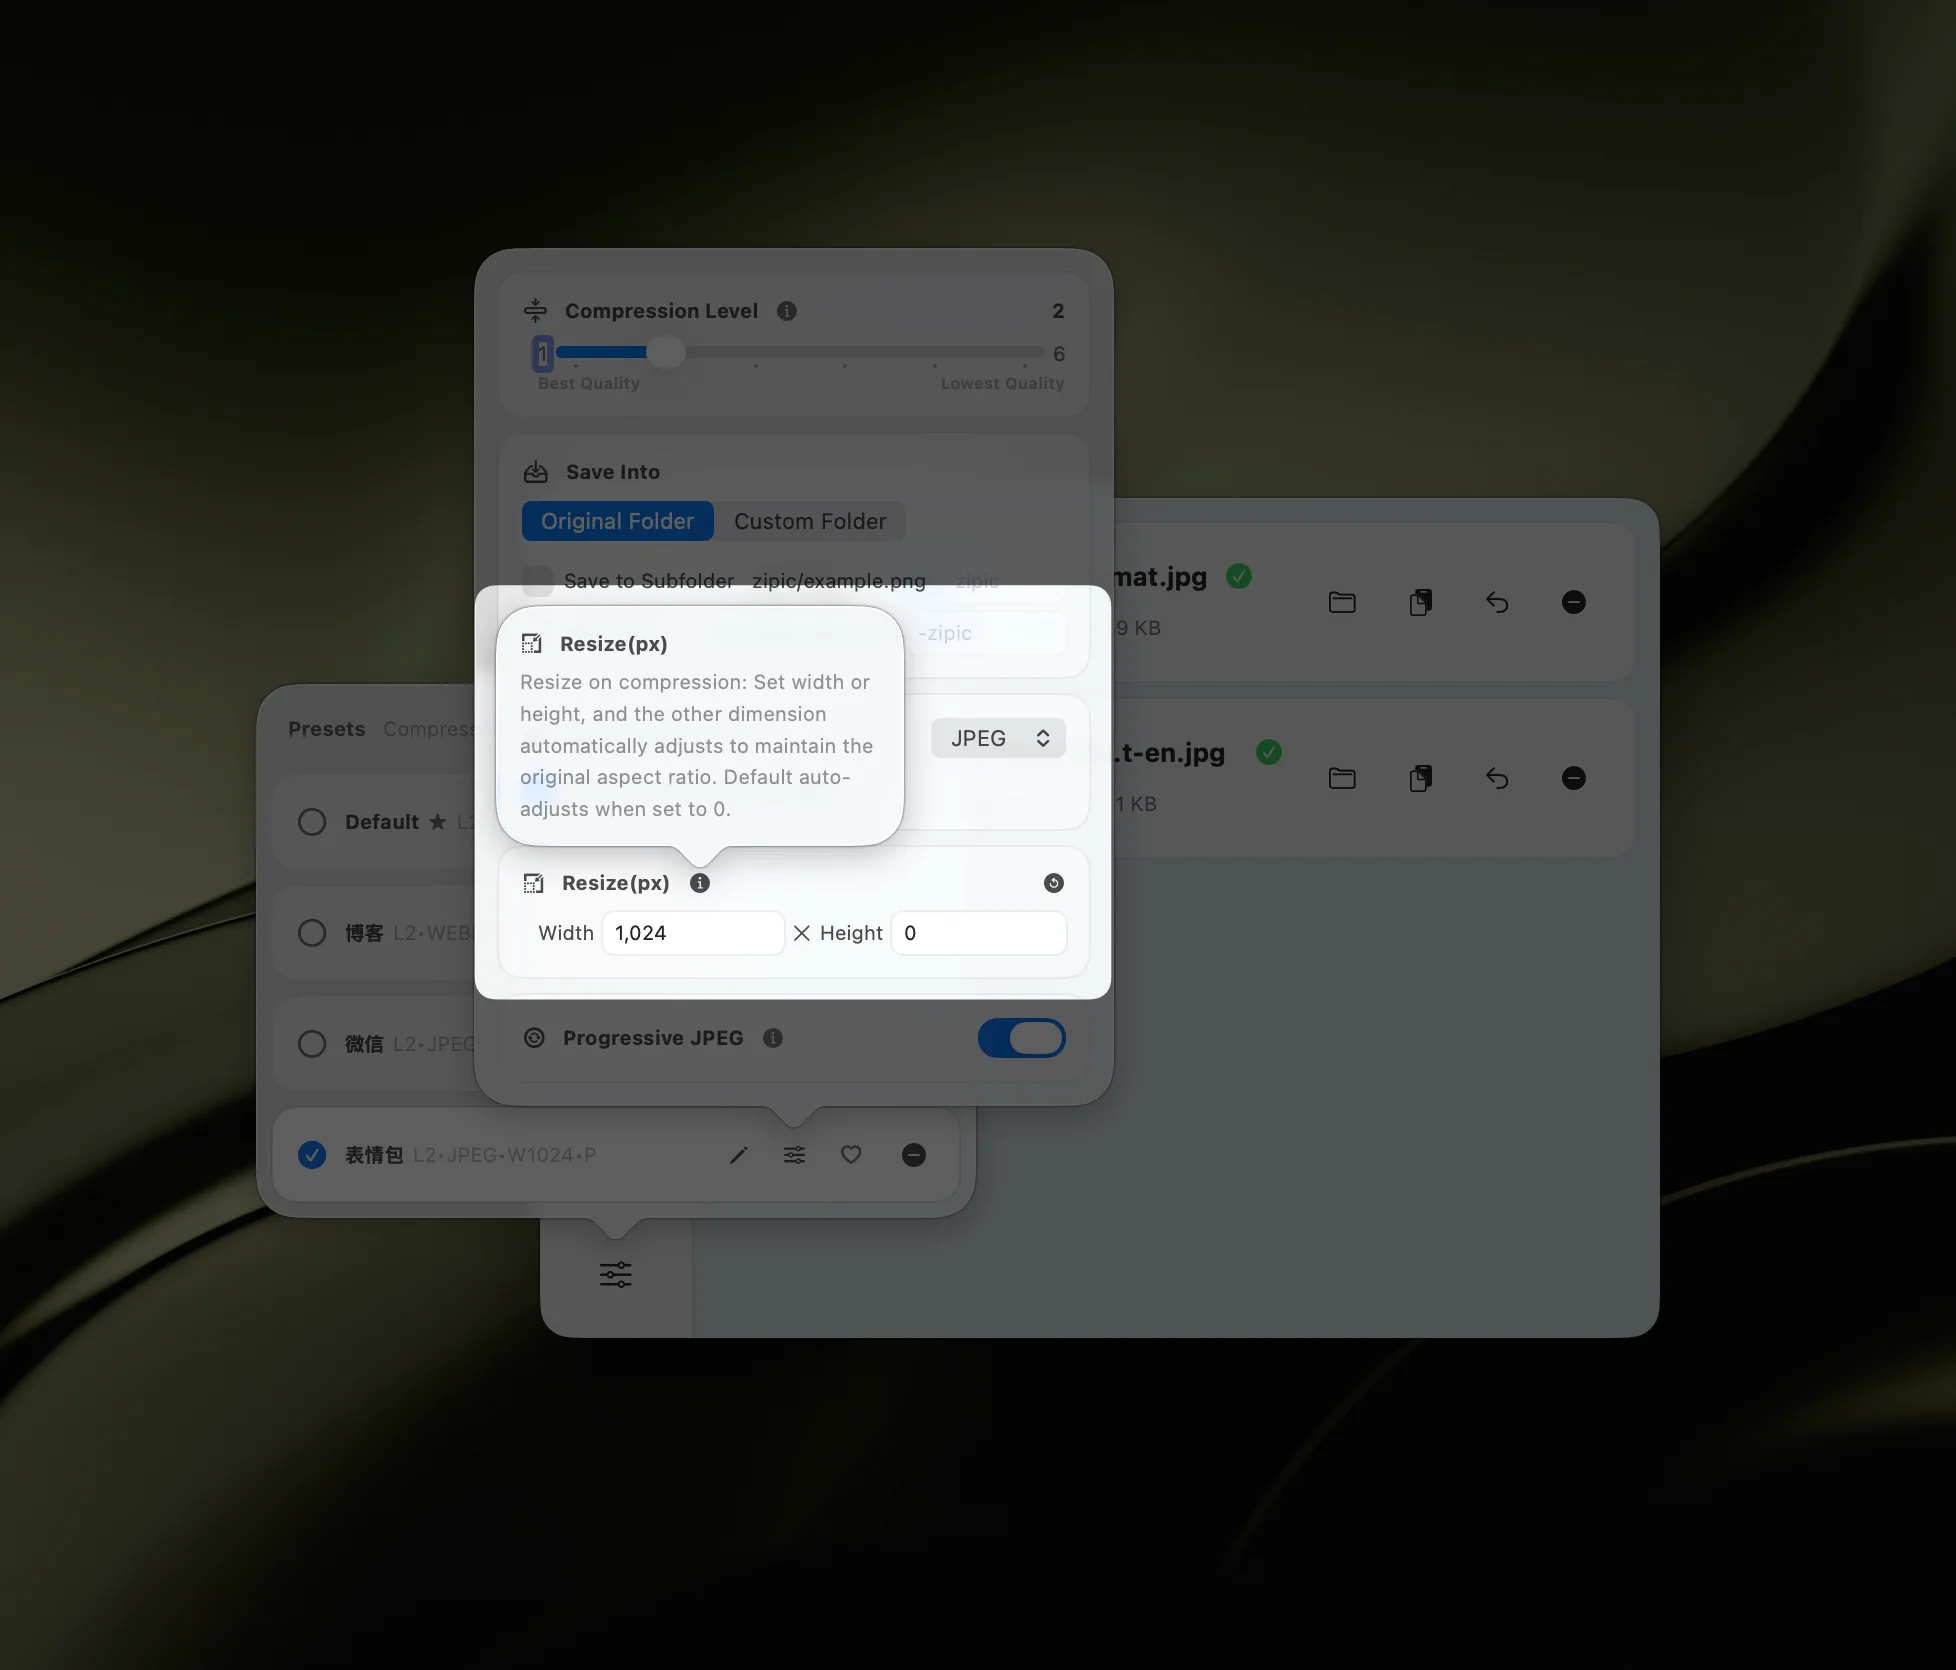
Zipic can resize images during compression. In the preset editor, set a maximum width or height and Zipic scales proportionally:
Practical sizing guidelines:
| Use Case | Recommended Max Width |
|---|---|
| Blog/article images | 1200–1600 px |
| Product thumbnails | 400–600 px |
| Social media sharing | 1080–1200 px |
| Email attachments | 800–1200 px |
| Hero/banner images | 1920–2560 px |
Combining resize + compression is the most effective way to reduce file size. A 4000px photo resized to 1200px and compressed at Level 2 can easily shrink from 8 MB to under 200 KB — a 95%+ reduction — with no visible quality loss at the intended display size.
See the full Resizing Images documentation for all options.
Method 3: Use Comparison Preview to Find the Sweet Spot
Every image compresses differently. Flat color backgrounds compress well at aggressive settings, while fine textures and sharp edges need gentler treatment. Zipic Pro’s comparison preview lets you find the perfect compression level for each image visually.
After compressing, click any thumbnail in the history list to open the comparison preview. You can:
- Zoom in to inspect fine details at full resolution
- Pan around zoomed images to check different areas
- Adjust compression strength directly with a slider — the preview updates in real time
This means you don’t need to recompress from scratch to try different settings. Compress once at your default level, then fine-tune in the preview window until the quality-to-size ratio is exactly where you want it.
This workflow is particularly valuable for hero images and key visuals where quality matters most. Spend 10 seconds in the preview to potentially save hundreds of kilobytes.
Learn more in the Image Compression Basic guide.
Method 4: Convert to Modern Formats
If your use case allows it, converting JPEG to a modern format can reduce file size even further — without touching quality:
| Format | Savings vs JPEG | Browser Support (2026) | Transparency |
|---|---|---|---|
| WebP | 25–34% smaller | 97%+ | Yes |
| AVIF | 40–50% smaller | 93%+ | Yes |
| HEIC | Similar to AVIF | Apple ecosystem | Yes |
| JPEG-XL | 30–40% smaller | Growing | Yes |
In Zipic, set the Save Format in your preset to convert JPEG files during compression:
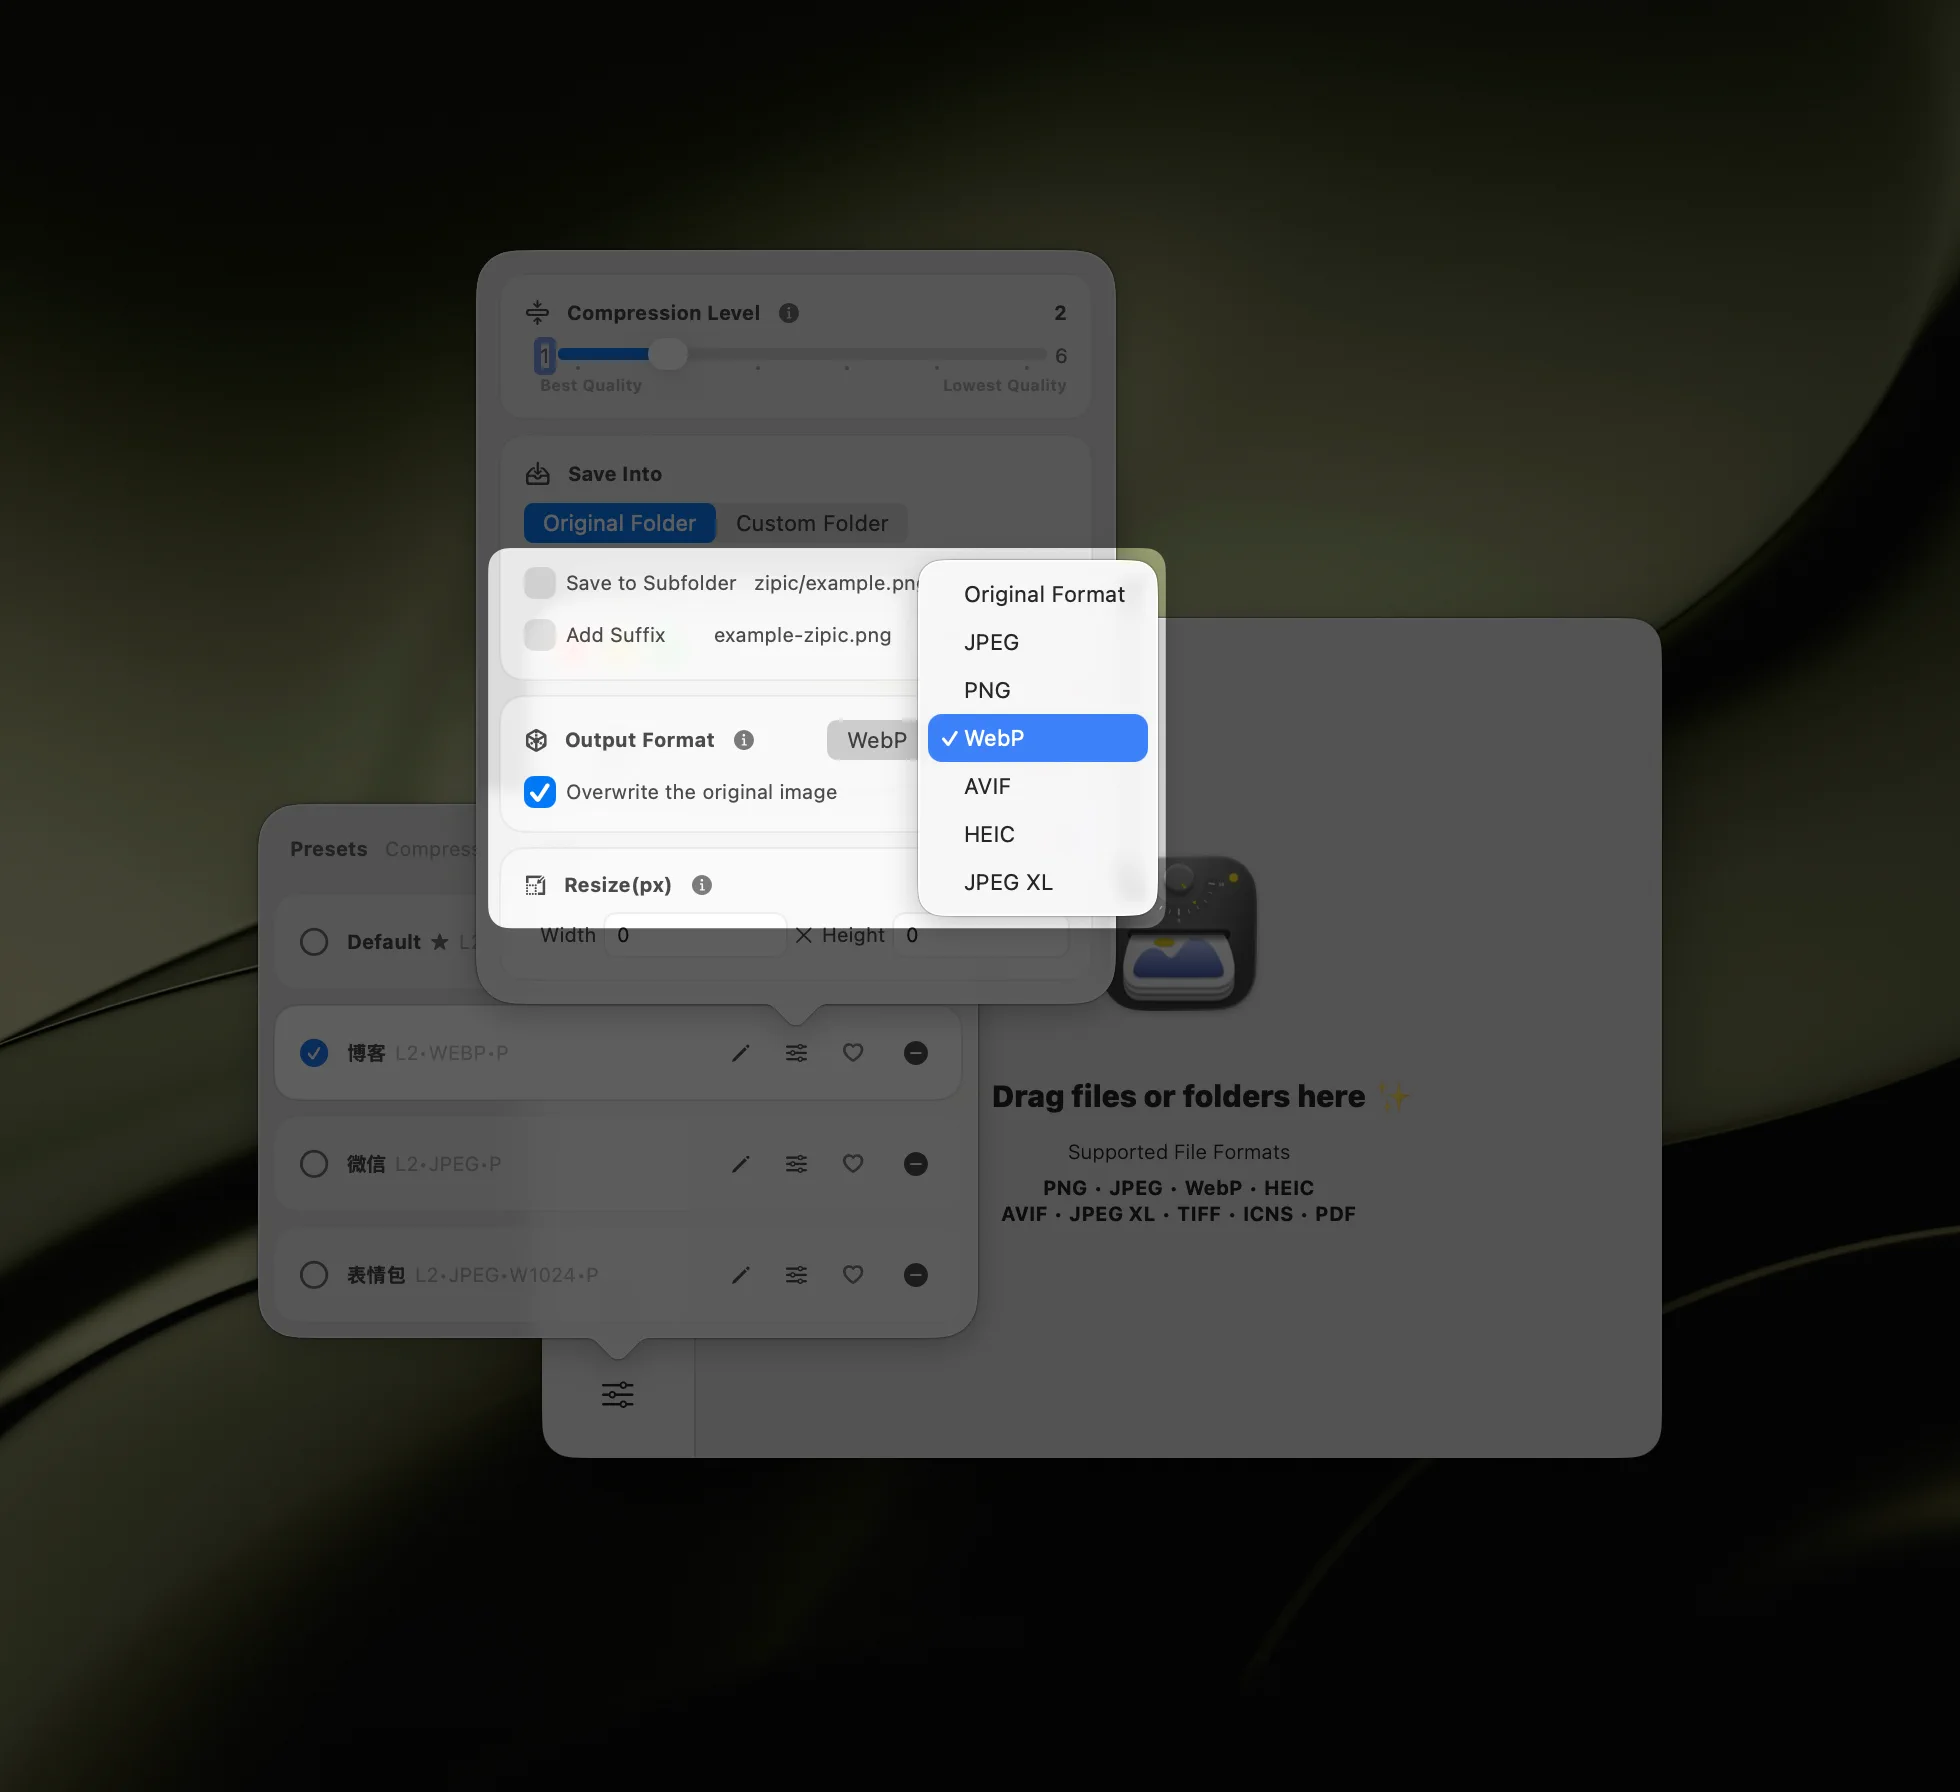
When to convert vs. when to keep JPEG:
- Convert to WebP for web images that need maximum browser compatibility
- Convert to AVIF for the smallest files where 93%+ support is acceptable
- Keep JPEG for email, social media (platforms re-encode anyway), and universal sharing
For a deeper format comparison, read JPEG vs PNG vs WebP: Which Format Should You Use? and the format selection guide. If AVIF interests you, see Best AVIF Compression Tool for Mac.
Method 5: Batch Compress JPEG Files
When you need to reduce hundreds or thousands of JPEG files, doing it one by one isn’t practical. Zipic handles batch compression natively:
- Drag entire folders into the main window — Zipic queues and compresses every image inside
- Mix formats freely — JPEG, PNG, WebP, and others process together in a single batch
- Consistent settings — every file uses your selected preset, ensuring uniform quality
For ongoing workflows, Zipic Pro offers folder monitoring: watch a directory and automatically compress every new image added to it. This is ideal for screenshot folders, download directories, or design export locations.
For a complete walkthrough, see Batch Compress Images on Mac: Complete Tutorial and the folder monitoring guide.
JPEG Compression: How Much Can You Save?
Here’s a practical reference for what to expect when reducing JPEG file size:
| Original File | After Level 2–3 | After Level 2–3 + Resize | Typical Use |
|---|---|---|---|
| 8 MB (DSLR photo) | ~2–3 MB | ~150–300 KB (1200px) | Blog article |
| 5 MB (iPhone photo) | ~1.5–2 MB | ~100–200 KB (1080px) | Social media |
| 2 MB (web screenshot) | ~600–800 KB | ~80–150 KB (800px) | |
| 500 KB (existing web image) | ~200–300 KB | ~50–100 KB (600px) | Thumbnail |
The combination of compression + resize consistently delivers the most dramatic results. For web images, this two-step approach routinely achieves 90–95% file size reduction from the camera original.
Tips to Avoid Quality Loss
JPEG is a lossy format — every compression pass permanently removes some data. Here’s how to minimize visible degradation:
-
Never re-compress the same file repeatedly. Each round of JPEG compression introduces new artifacts. Zipic’s smart skip feature automatically recognizes previously compressed files and avoids redundant processing.
-
Keep your originals. Use Zipic’s save options to preserve the source file: save compressed versions to a subfolder, add a suffix like
_compressed, or specify a separate output directory. See Save Options for all modes. -
Resize first, then compress. Resizing a large image to its display dimensions before applying compression produces better results than using aggressive compression on an oversized image.
-
Use the comparison preview. Instead of guessing whether Level 3 or Level 4 is right, visually verify the result at 100% zoom. A few seconds of checking saves you from discovering artifacts later.
-
Compress from the highest-quality source available. Starting from a RAW export or a high-quality JPEG (95+) gives the encoder more data to work with, producing cleaner results at any target size.
Understanding the fundamentals helps: read Lossy vs Lossless Compression Explained for the full technical background.
Get Started
Zipic is free to download and compresses JPEG files on macOS out of the box.
- Download Zipic
- Drag it to Applications
- Drop your first JPEG and see the results
Upgrade to Zipic Pro for comparison preview, folder monitoring, Notch Drop, paste compression, unlimited presets, and advanced format support.
Related Articles
- Lossy vs Lossless Compression Explained
- Optimize Images for Web Performance
- How to Compress Images on Mac — The Complete Guide
- JPEG vs PNG vs WebP: Which Image Format Should You Use?
- Best AVIF Compression Tool for Mac
For the full feature documentation, visit docs.zipic.app.