Image Tools for Content Creators and Bloggers
A publishing-focused guide to image compression for bloggers: per-platform sizing, three-artifact workflow, Zipic presets, and Exports-folder automation.
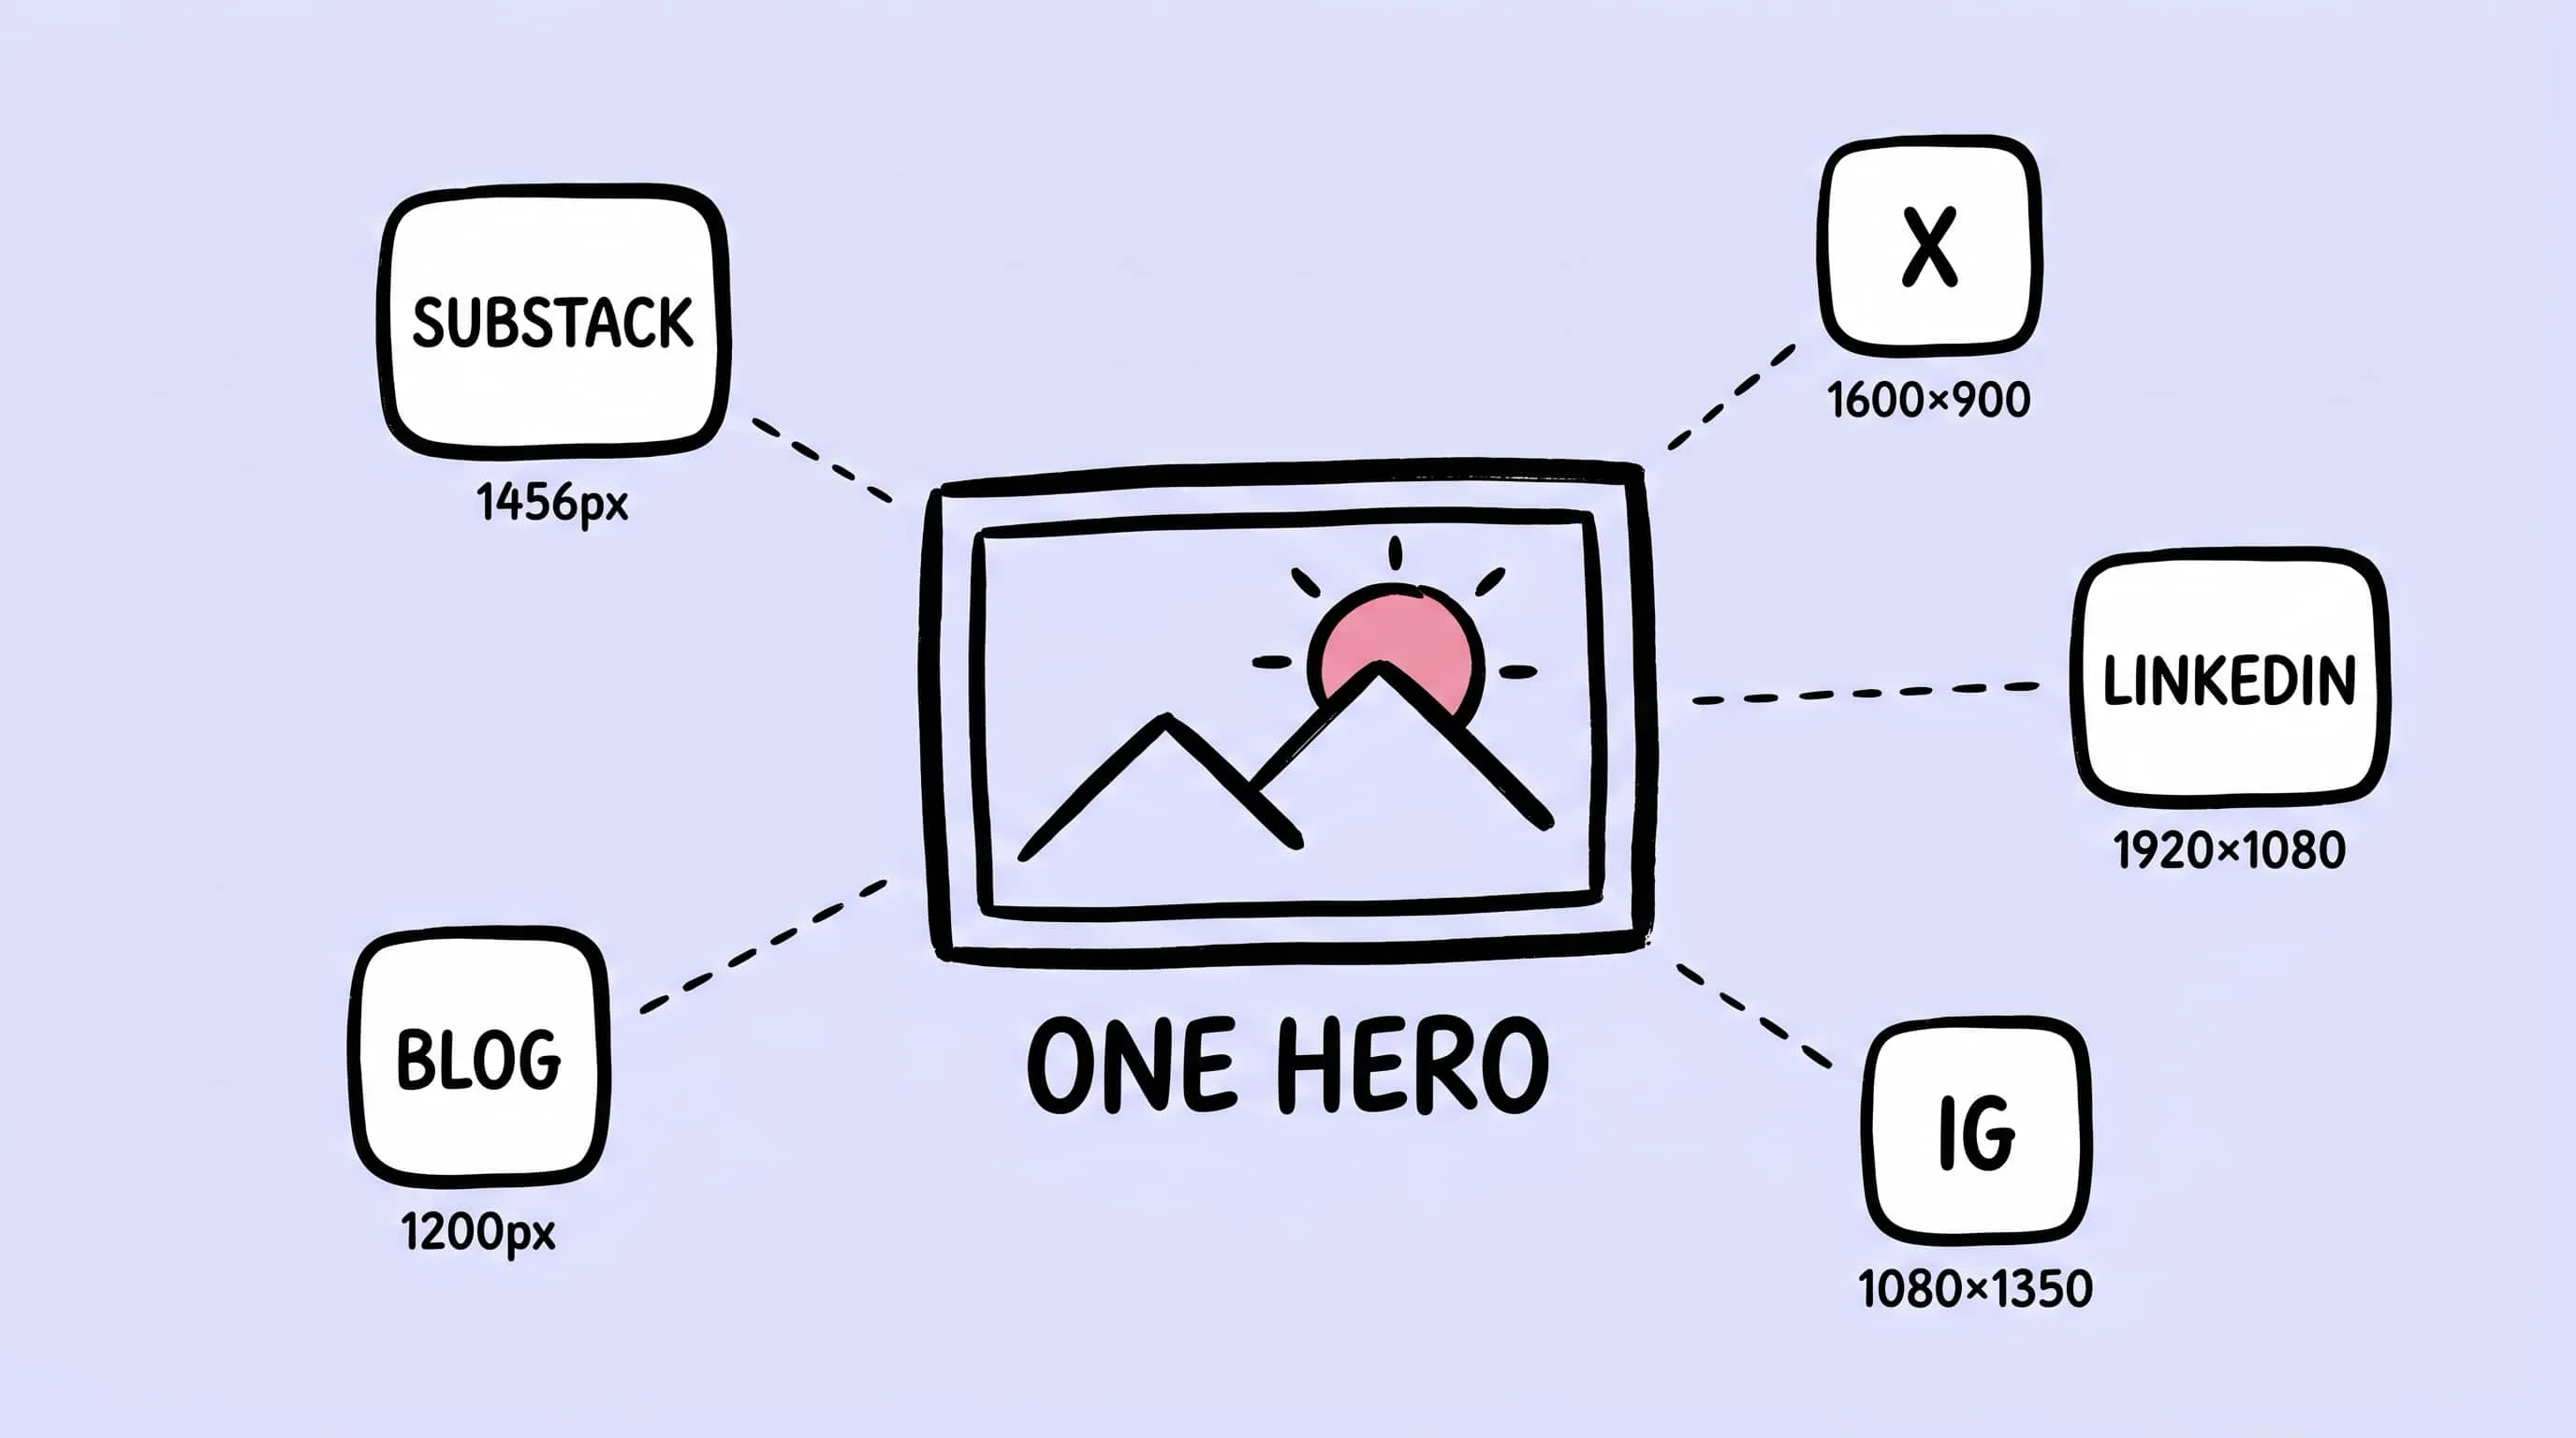
Every Tuesday I ship one essay. That one essay becomes a Substack email, a Ghost blog post, a Twitter/X thread with a teaser card, a LinkedIn repost, and — on a good week — an Instagram carousel. All of it leans on the same hero image. And yet, the moment I try to reuse a single 4,000 px Figma export across all five destinations, something breaks: the newsletter preview crops the face off, Twitter rejects the file size, Instagram stretches the 1.91:1 crop into a column of empty space. This is the real reason image compression for bloggers is hard. It is not one image. It is one idea, rendered at five different sizes, three formats, and wildly different budget ceilings.
This guide is for solo creators who hit “Publish” on more than one surface from the same laptop. We will build a per-platform sizing matrix, define the three artifacts every post actually needs, set up Zipic presets around destinations (not quality sliders), and finish with an automation that compresses exports the moment they land on disk.
The platform sizing matrix
Start by writing down where the image is going. Different platforms have different sweet spots in 2026, and “bigger is better” is wrong on all of them — every service re-encodes your upload and shows a visibly worse result if the source is wasteful.
| Destination | Recommended width/size | Format | Target file size |
|---|---|---|---|
| Substack post hero (social preview) | 1456 x 1048 px, 14:10 ratio | JPEG or PNG | Under 500 KB |
| Ghost featured image | 1200 x 628 px (1.91:1) or cover image 1500 px+ wide | JPEG or WebP | Under 300 KB |
| Medium story cover | ~2000 px wide, 3:2 or 16:9 crop | JPEG | Under 500 KB |
| WordPress featured image (modern block themes) | 1200 x 628 px baseline; check theme docs | JPEG or WebP | Under 300 KB |
| X single-image post | 1600 x 900 px (16:9) or 1080 x 1350 portrait | JPEG or PNG | Under 5 MB (hard limit) |
| LinkedIn article cover | 1920 x 1080 px (16:9) | JPEG | Under 8 MB (hard limit) |
| Instagram feed (portrait default) | 1080 x 1350 px (4:5) | JPEG | Under 1 MB |
| Instagram square / story | 1080 x 1080 / 1080 x 1920 | JPEG | Under 1 MB / Under 2 MB |
Two observations. First, the 1200 x 628 px “social card” size is doing double duty across Ghost and WordPress because it is also the Open Graph default — the same export feeds the blog hero and the link-preview card your readers see when someone shares the URL. Second, Instagram’s 4:5 portrait is now the default on-feed display, so if you are cropping a blog hero for IG, crop taller rather than wider.
The three image artifacts every post needs
Because no single export survives every platform, pull one master and derive three artifacts from it.
The hero. This is the anchor image at the top of the blog post. It is the widest, highest-quality export — roughly 1600–2000 px wide — and it earns the extra bytes because a reader spends the most time on this image. Format: WebP on your own blog (smaller files, lossless transparency if needed), JPEG if Substack or Medium is the canonical home.
Inline figures. Screenshots, diagrams, the occasional photo inside the body. These sit inside a ~720 px reading column on most blogs, which means you rarely need more than 1400 px wide for retina rendering. Compress harder than the hero — nobody zooms into an inline figure. Format: PNG for UI screenshots with sharp text, WebP or JPEG for photos.
The social share card. This is the version that rides into Twitter/X and LinkedIn with your post link. It has to survive aggressive re-encoding, so export at 1600 x 900 px and compress to a file the platform will happily keep intact (under 1 MB is safe). Do not reuse the hero directly — the hero is usually too tall or too lossy after its own compression pass.
If you remember nothing else: the hero is for reading, the inline figures are for scanning, the share card is for thumbnails. They are not the same file.
Setting up Zipic presets around platforms, not vague quality
The most useful habit I have picked up is naming presets after destinations. “Level 3 webp” means nothing in week 12 of publishing. “Substack hero” means exactly one thing: this is the file I attach when composing a newsletter.
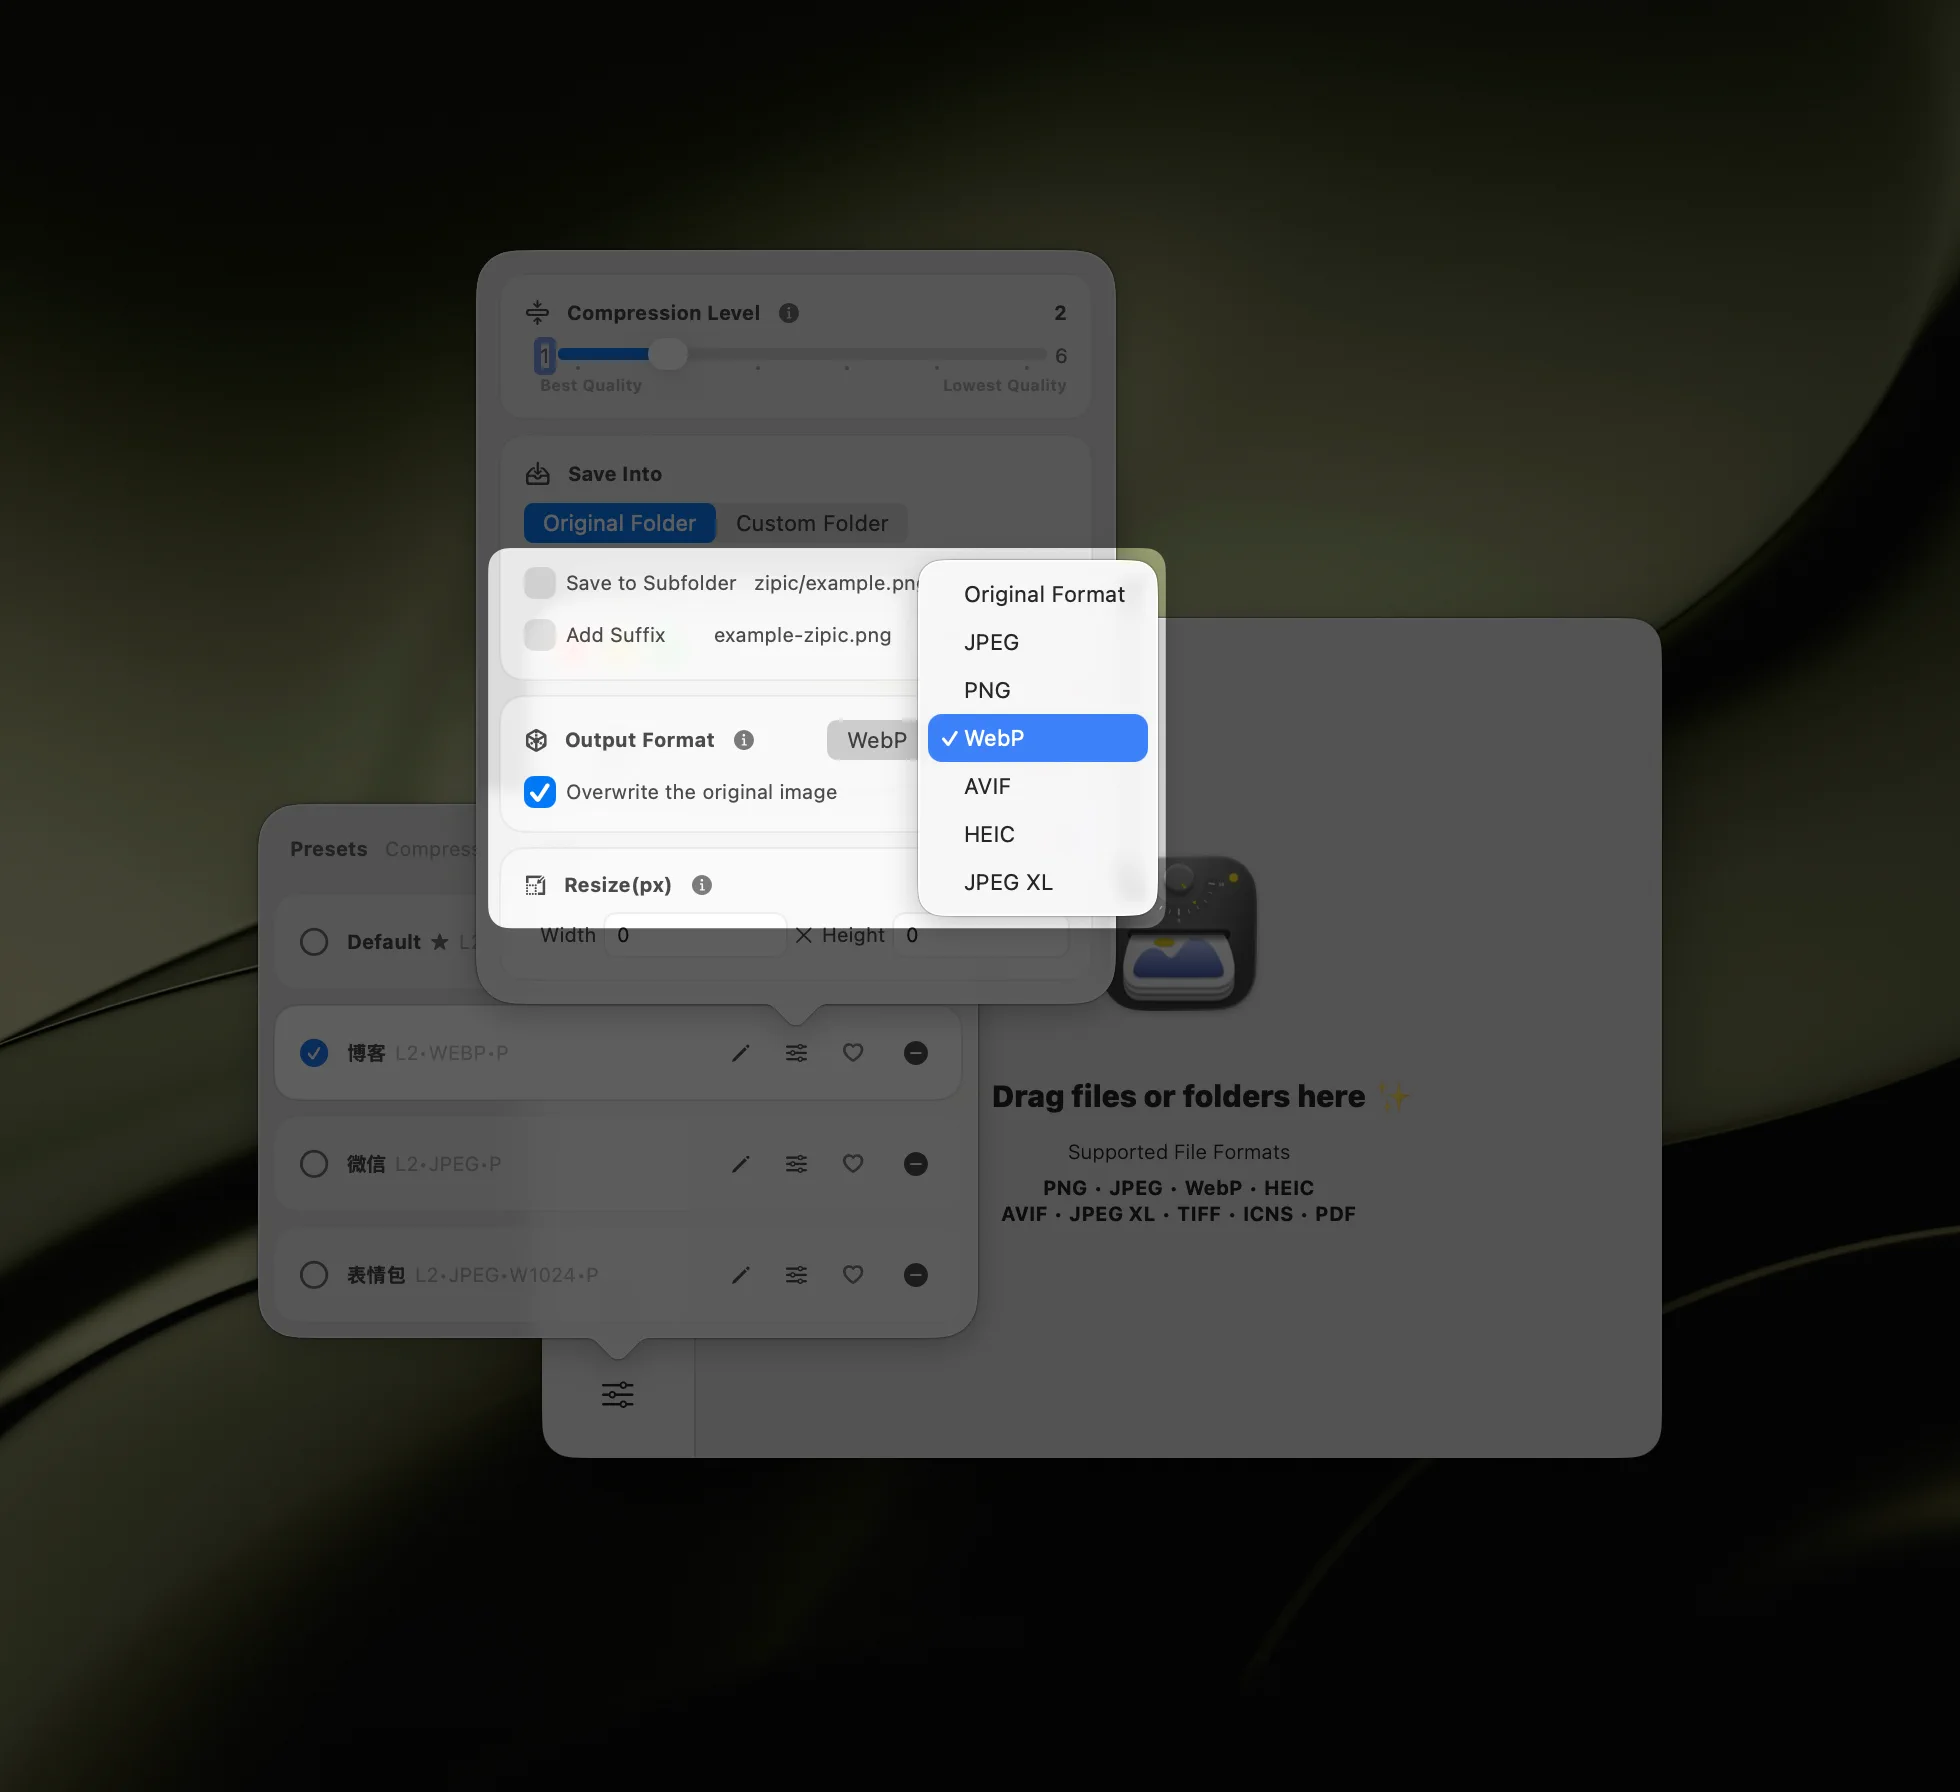
In Zipic, open Compression Settings at the bottom-left of the main window. You will see the preset list — click the plus icon in the top-right to create a new one.
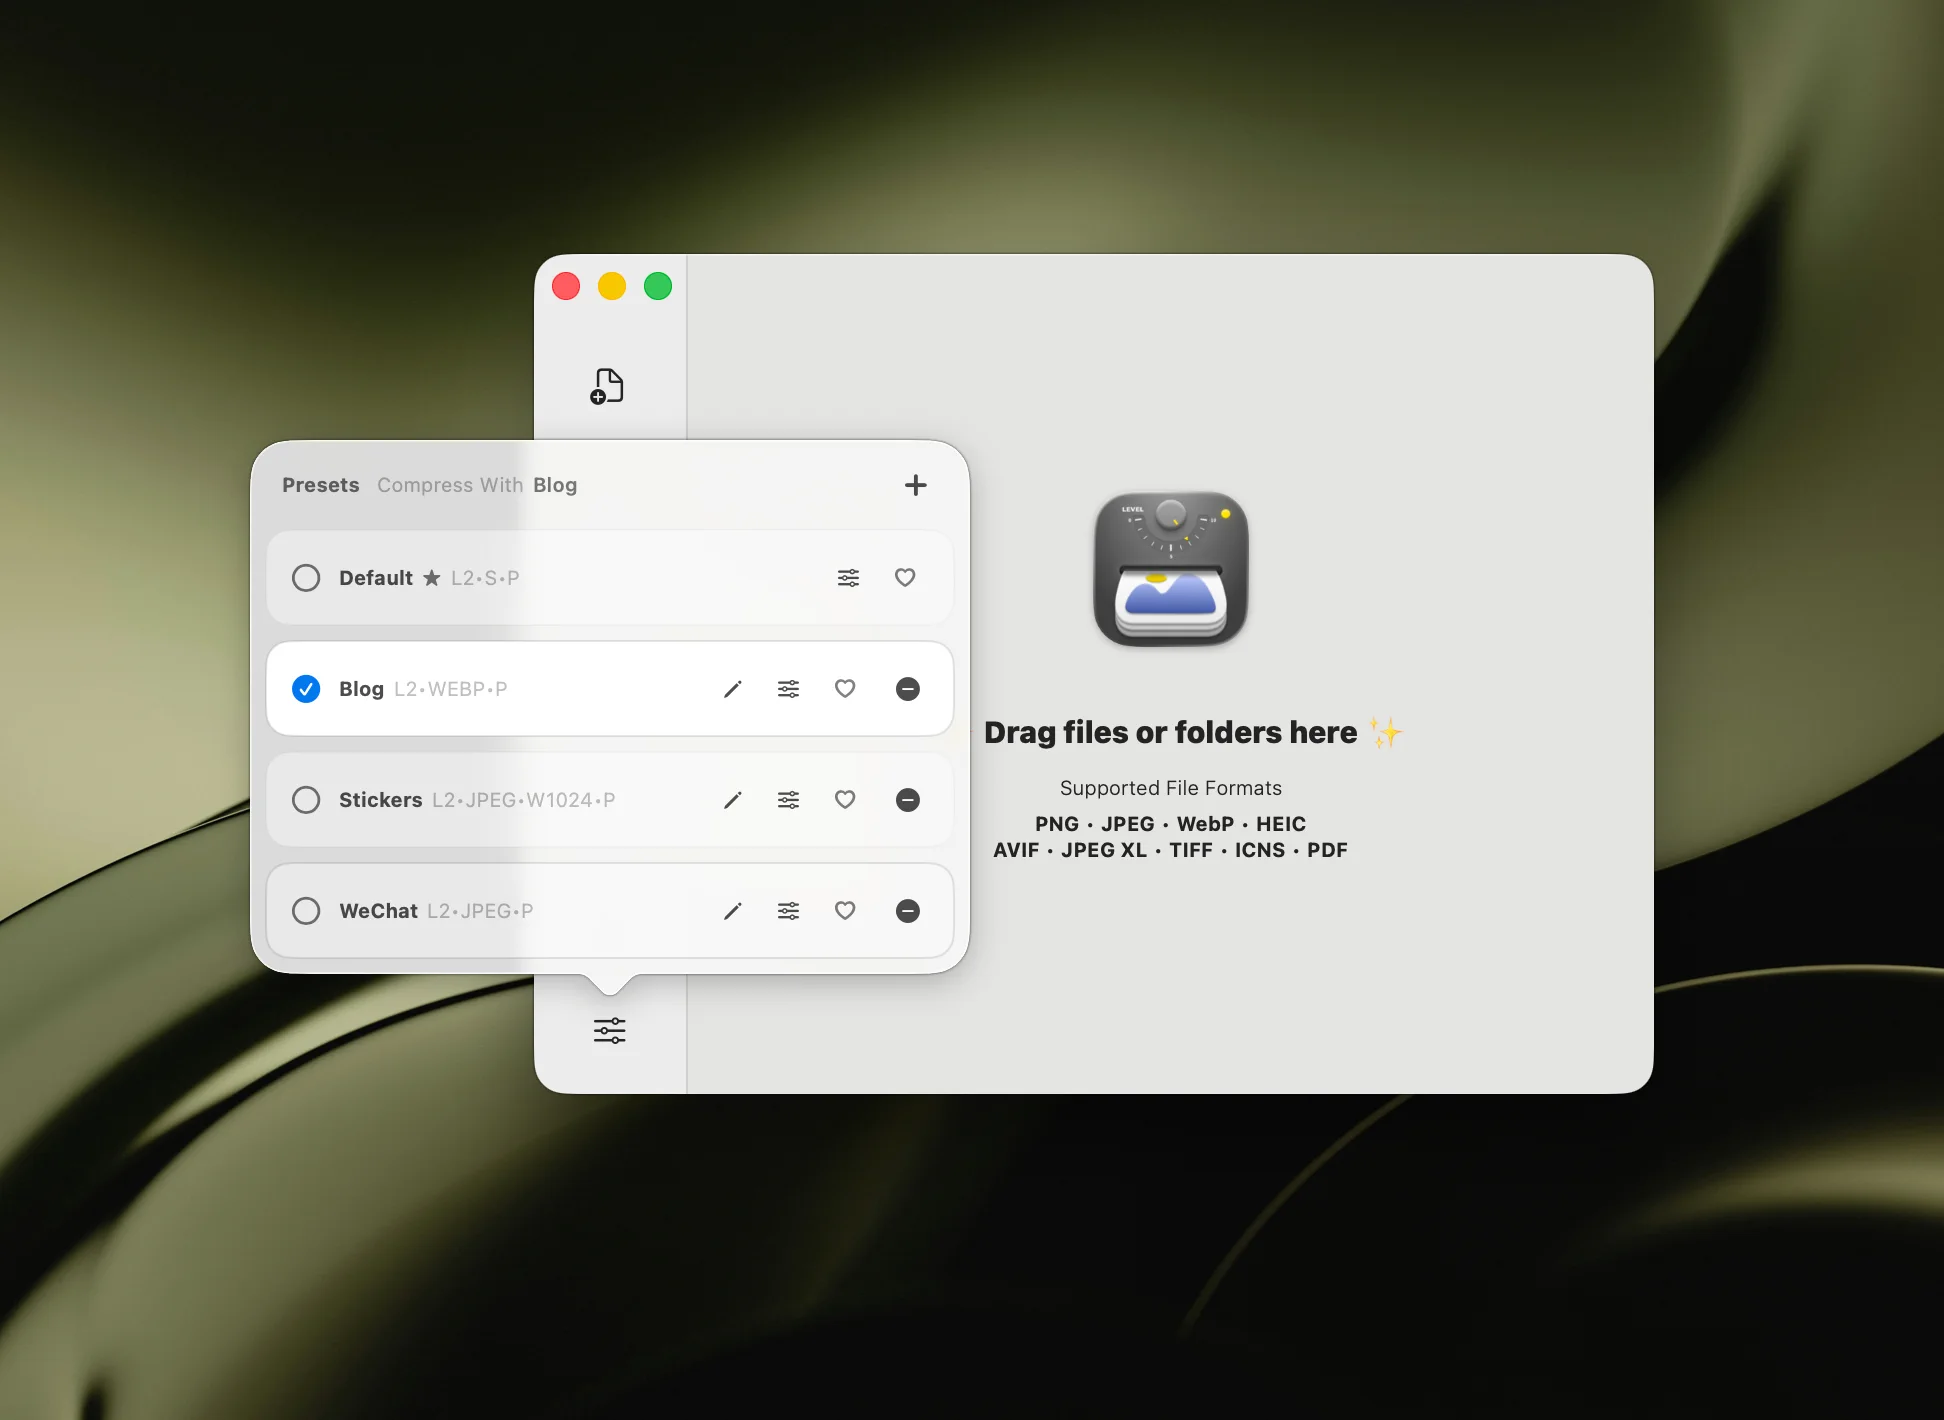
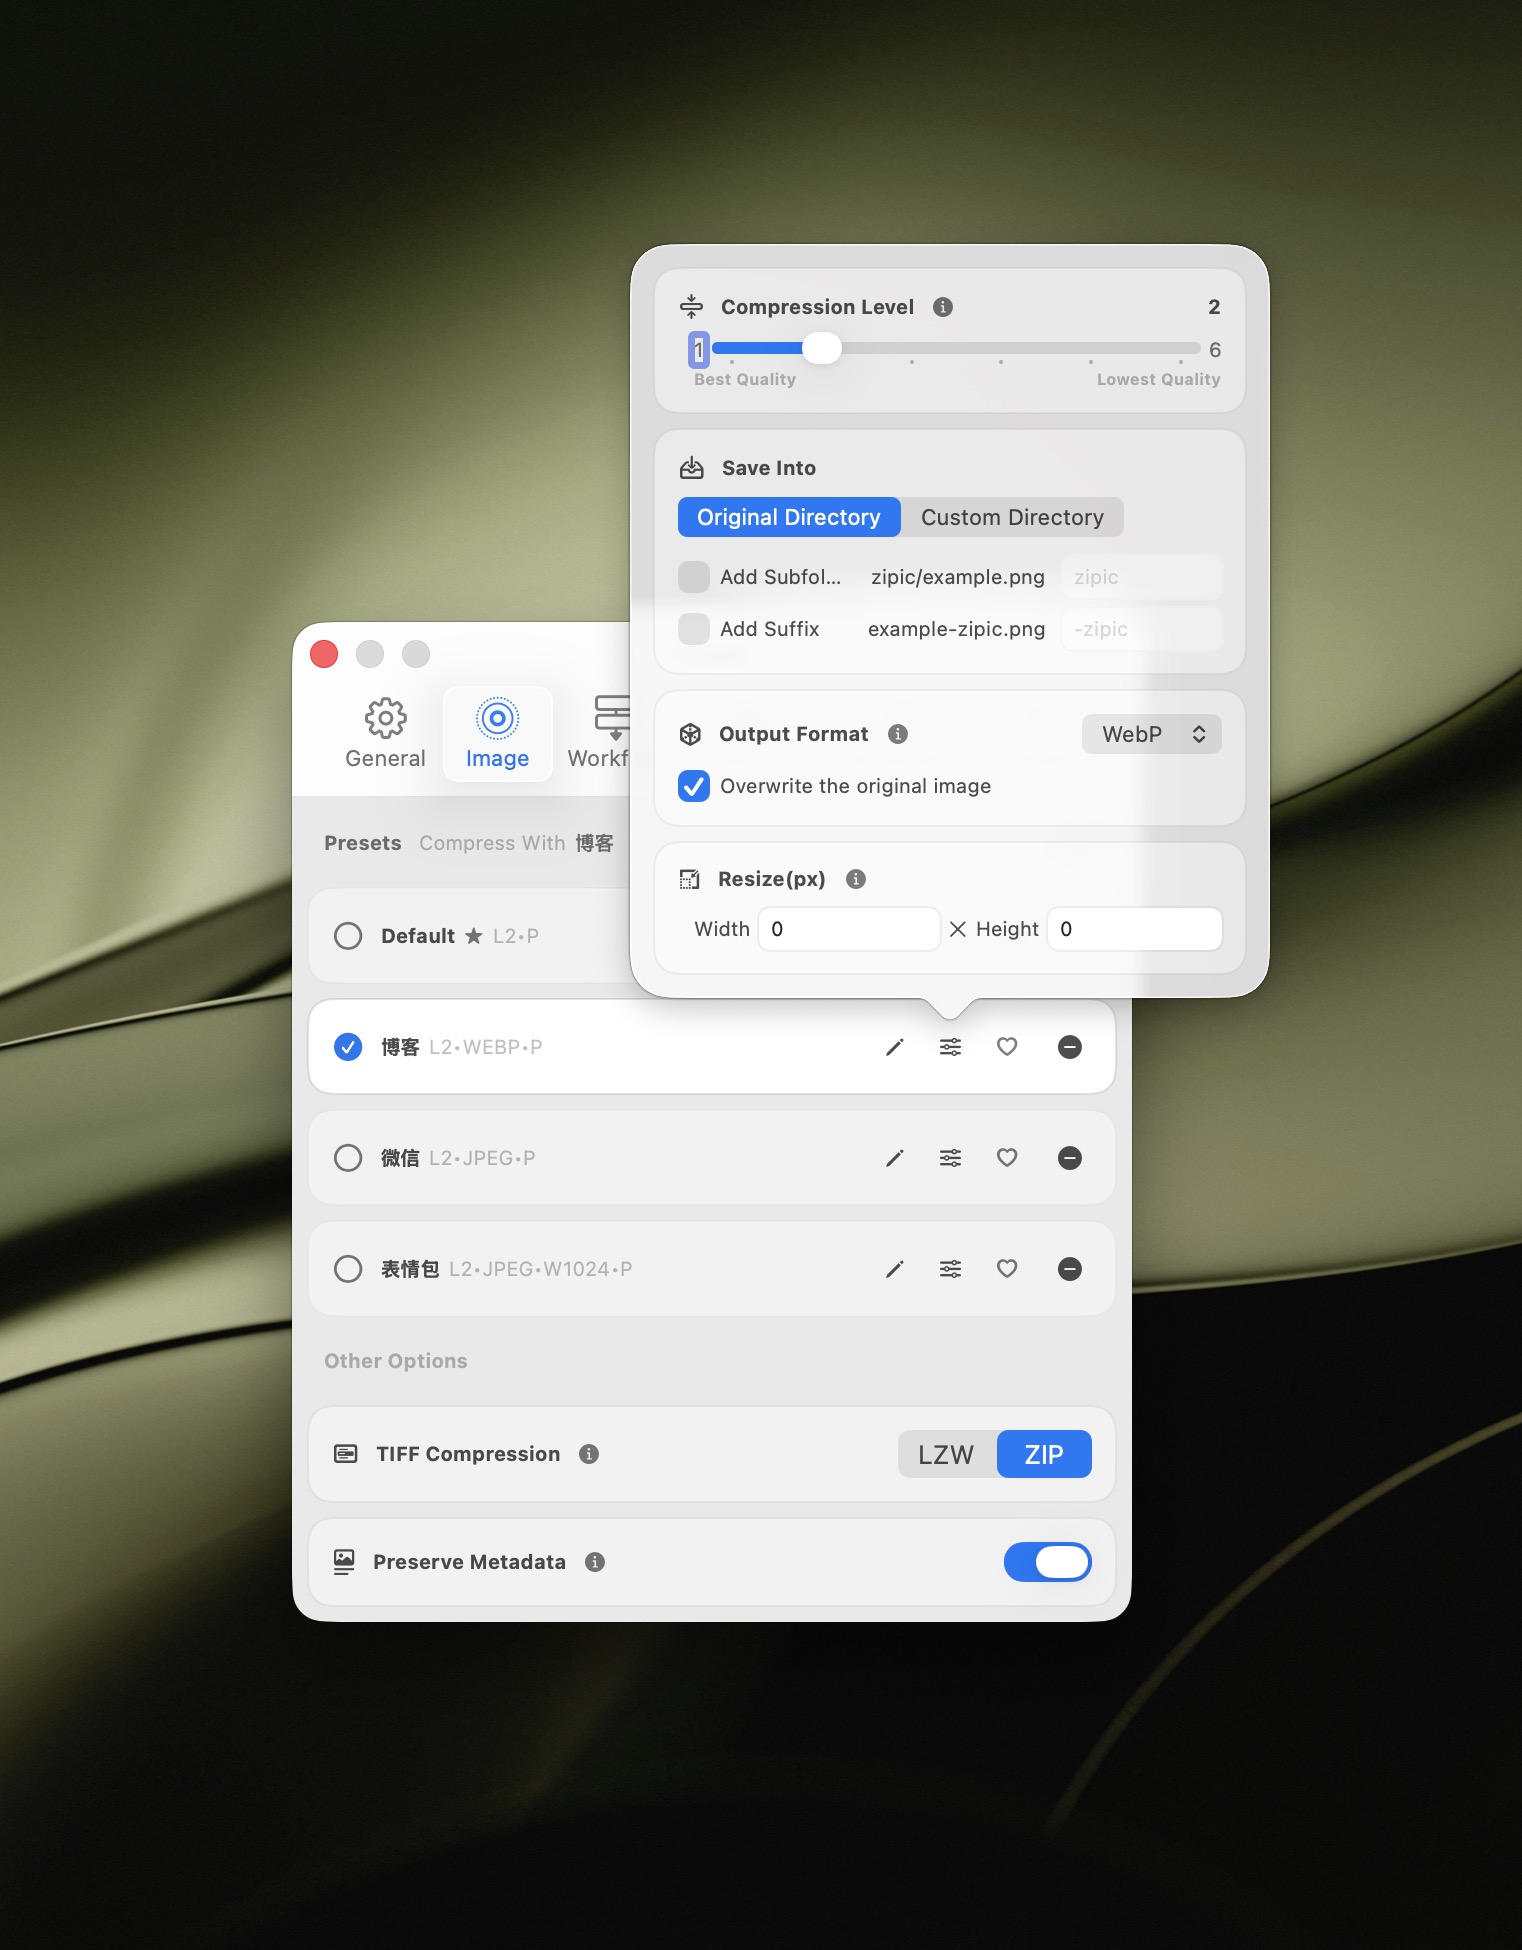
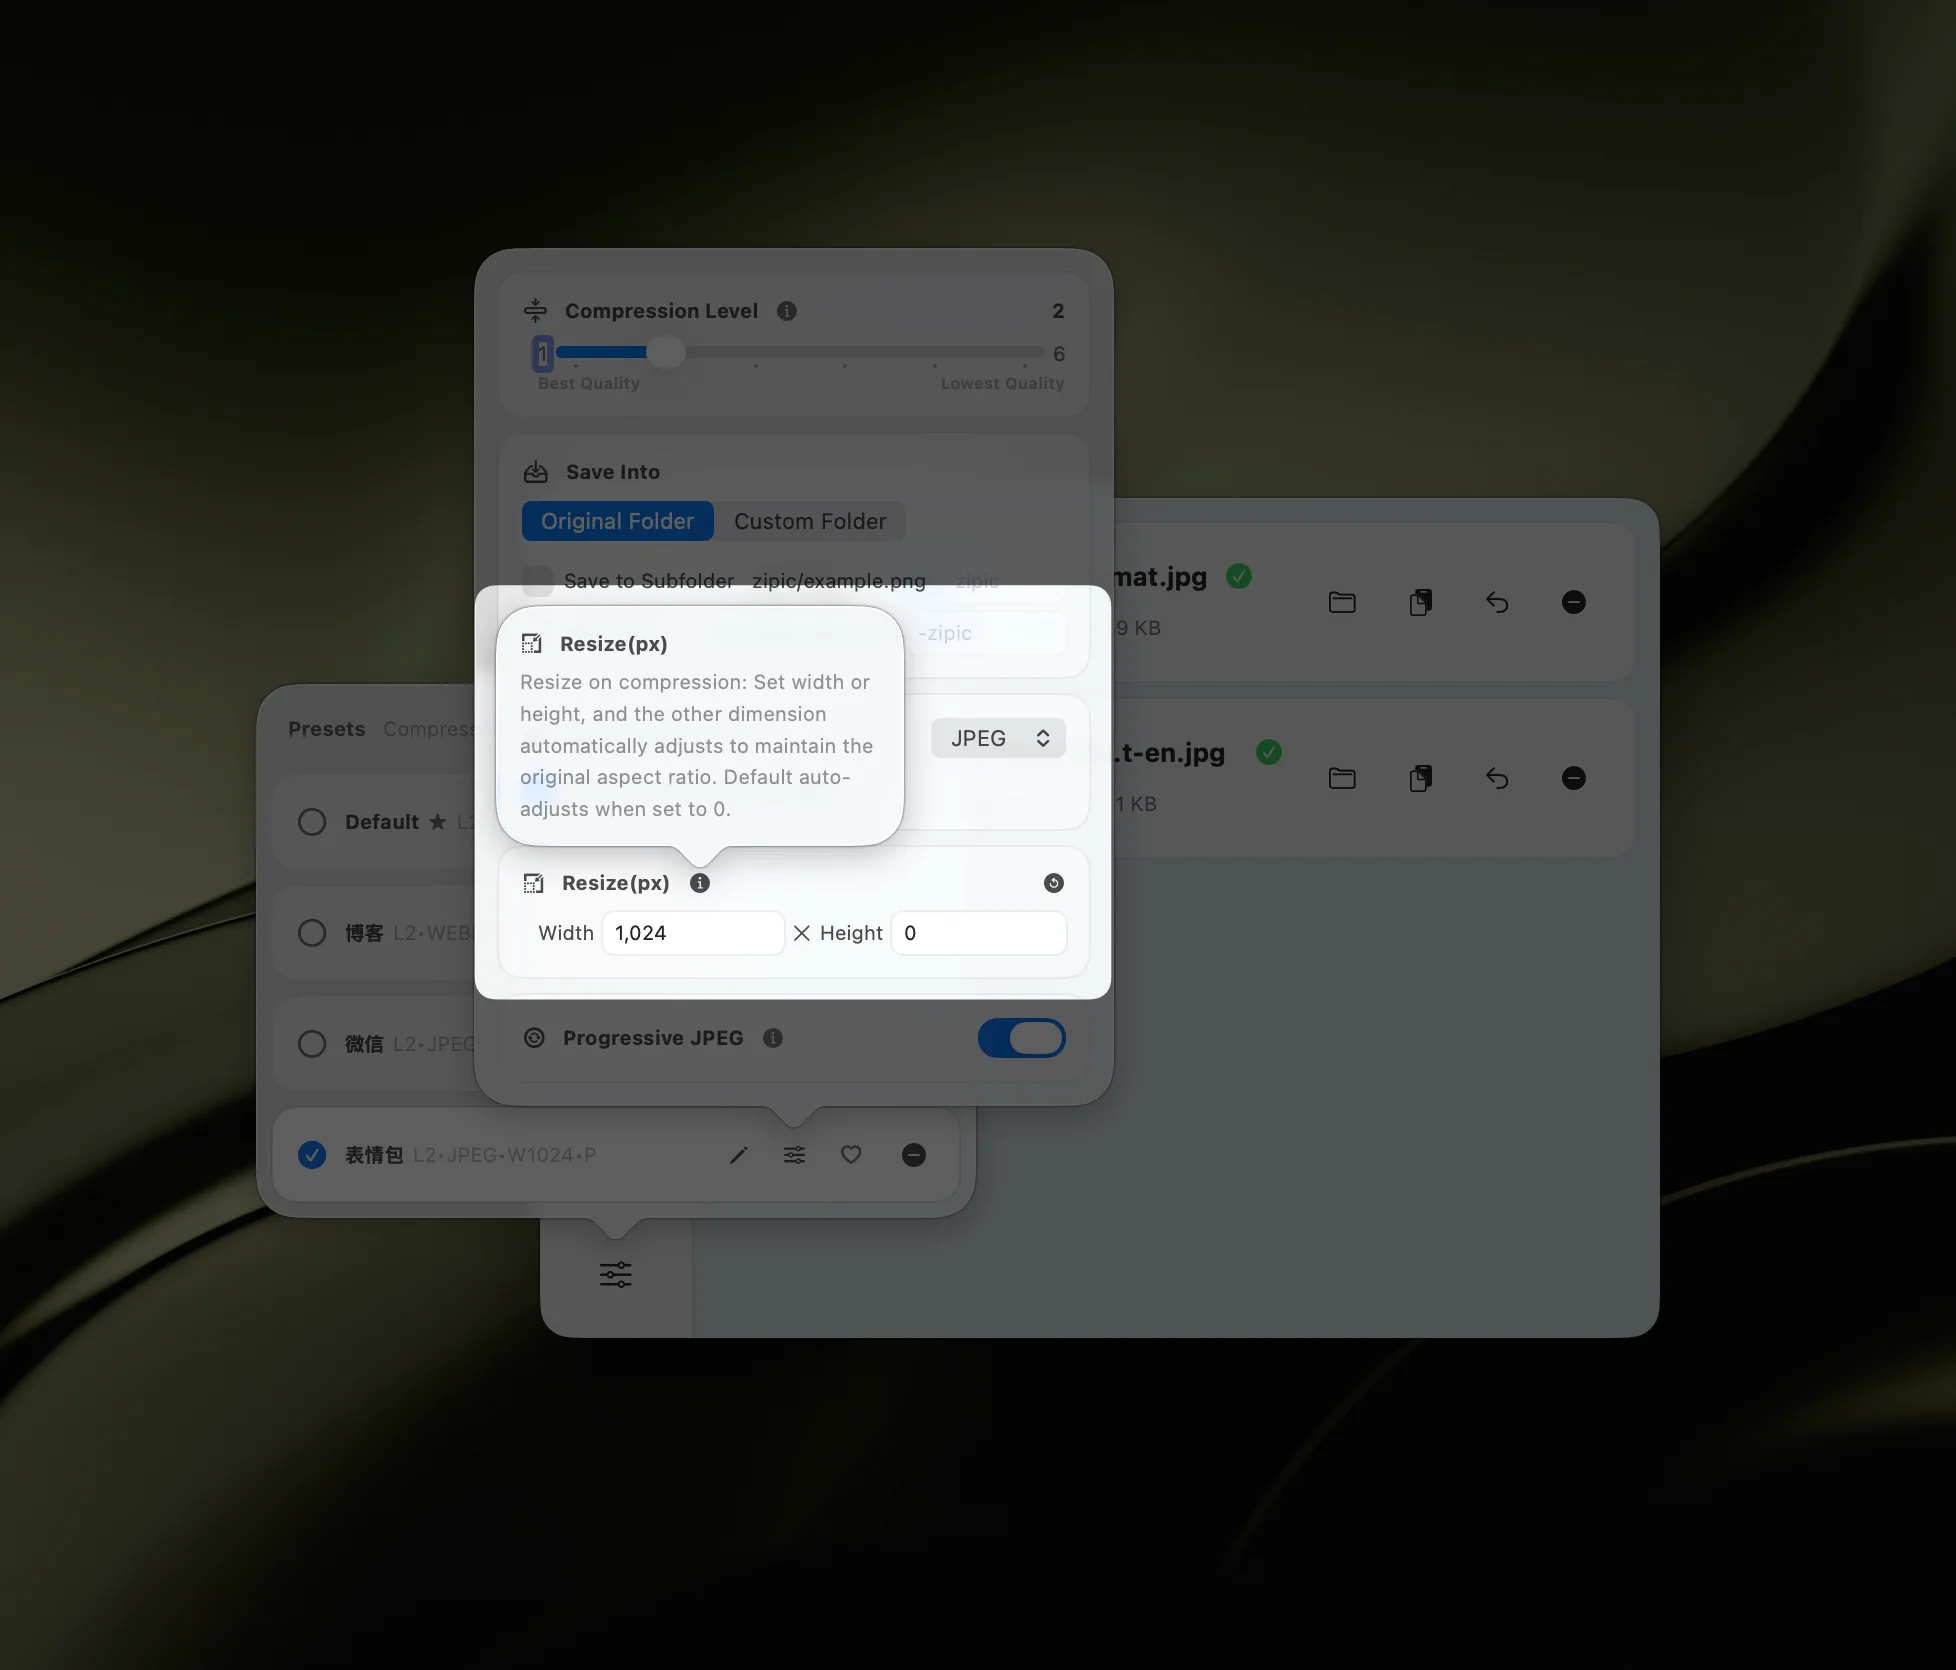
Here is the starter set I run with. Each preset pins a format, a width cap, and a compression level between 1 and 6 (higher is smaller). Zipic preserves aspect ratio automatically — set only width and leave height on auto.
- Substack hero — JPEG, width 1456, level 3. Keeps Substack’s 14:10 preview crop intact.
- Ghost hero — WebP, width 1500, level 3. Fits the 1200 x 628 featured slot with headroom for retina.
- Medium cover — JPEG, width 2000, level 2. Medium re-encodes hard; feed it clean.
- Inline figure — WebP, width 1400, level 4. For body screenshots and illustrations.
- Twitter card — JPEG, width 1600, level 3. Stays well under the 5 MB ceiling.
- LinkedIn cover — JPEG, width 1920, level 3. Matches the 16:9 article template.
- IG square — JPEG, width 1080, level 3. One preset covers feed + story with a height swap.
A small but important Zipic behavior: there is no Start button. The moment you drop a file in, it compresses with whatever preset is currently active. That is why naming presets after destinations matters — picking the wrong preset is the only thing between you and a bad export.
If you want a one-off preset without changing your default, hold Option while dragging files onto the main window or the Notch area. Zipic shows a quick switcher with your top six presets, so keep your most-used ones near the top of the list in Settings.
The cover-image workflow
For the hero image itself, my Tuesday flow looks like this.
- Source. Either a sketch prompt generated from the article outline (Zipic’s own blog covers run through a
sketch-image-promptflow that takes the article summary and returns a hand-drawn brief), or a stock photo from Unsplash/Pexels if the piece is more editorial. - Master export. Figma, Affinity, or whatever tool produced the image — export at 2x the largest destination width. For most of my posts that is 3000 px wide PNG.
- Derive the three artifacts. Drop the master into Zipic three times, switching presets between drops: Ghost hero, Twitter card, Instagram square. Ten seconds.
- Alt text. Write it now, not at upload time. Describe the subject, not the decoration — “Hand-drawn illustration of a laptop splitting one image into three sized exports” beats “Blog cover image.”
- Archive the master. Keep it outside the compressed-outputs folder. You will need it again when you rewrite the headline and suddenly the hero needs re-cropping.
Automation: watching an Exports folder
Here is where the real time savings hide. If you export images to the same folder every week, point Zipic’s folder monitoring at it and pair the folder with a fixed preset. Every new file that lands in the folder is compressed automatically — no drag, no drop, no Finder roundtrip.
Folder monitoring is a Zipic Pro feature. To set it up, open Settings → Automation → Folder Auto Compression, click the plus button, choose the folder, and open Compression Options to attach a preset. The monitoring depth controls how far into subfolders Zipic looks — default 2 is usually enough. Zipic skips already-compressed files automatically, so re-running a folder is safe.
A nice pattern: one monitored folder per destination. ~/Exports/Ghost-Hero uses the Ghost hero preset. ~/Exports/Twitter uses the Twitter card preset. Drag the master export into the right folder and the correctly-sized file shows up in the output location before you have switched tabs back to the browser.
If you are on free Zipic or want even lighter automation, two alternatives work well:
- Raycast. The Zipic Raycast extension compresses whatever is selected in Finder with a single keystroke. Useful when the destination changes per file.
- Apple Shortcuts / Finder Quick Actions. Zipic’s URL Scheme (
zipic://compress) accepts file URLs, a preset-matching level, a format, and a target directory. Bind a Shortcut to Finder’s right-click menu and you have a “compress for Twitter” context item.
Between a monitored folder and a Raycast hotkey, image compression stops being a step in your publishing checklist and becomes the background state of your laptop.
Research Notes
Platform size numbers in the matrix were verified against publishing guides dated 2026 in the week this post was written. Treat the linked sources as the source of truth — any platform can change its guidance without notice.
- Substack optimal image dimensions: Substack support
- Ghost featured image sizing: Ghost themes asset docs and Ghost forum guidance
- Medium featured image focal point: Medium help article
- WordPress featured image 1200 x 628 pattern: Liquid Web WordPress guide
- X single-image posts: Hootsuite social sizes April 2026 and MergeImages Twitter/X 2026
- LinkedIn article cover (8 MB limit): LinkedIn Help image specs
- Instagram 4:5 portrait default in 2026: Buffer Instagram size guide
Related Articles
- Optimize Images for Web Performance
- Batch Compress Images on Mac
- How to Optimize Images for SEO
- Compress AI Images: GPT Image 2, Nano Banana Pro, Midjourney
- Batch Remove EXIF on Mac: Strip Metadata Before Publishing
- Auto-Compress a Folder on Mac with Folder Monitoring
Zipic documentation: Folder Monitoring Auto Compression · Basic Image Compression
Ready to make image compression less manual? Download Zipic and start with the free daily allowance. Every download includes a full 7-day Pro trial. Zipic Pro unlocks unlimited compression, advanced formats, folder monitoring, URL Scheme automation, and workflow features for serious batches.
Related Reading
Batch Compress Images on Mac: 5 Fast Methods That Scale
Batch compress images on Mac with folders, Finder, Raycast, monitoring, or Shortcuts. Compare setup, automation, Pro needs, and safe output options.
How to Compress Images on Mac: 5 Methods That Work
Learn how to compress images on Mac with drag-and-drop, Finder, presets, format conversion, and batch automation while protecting originals and quality.
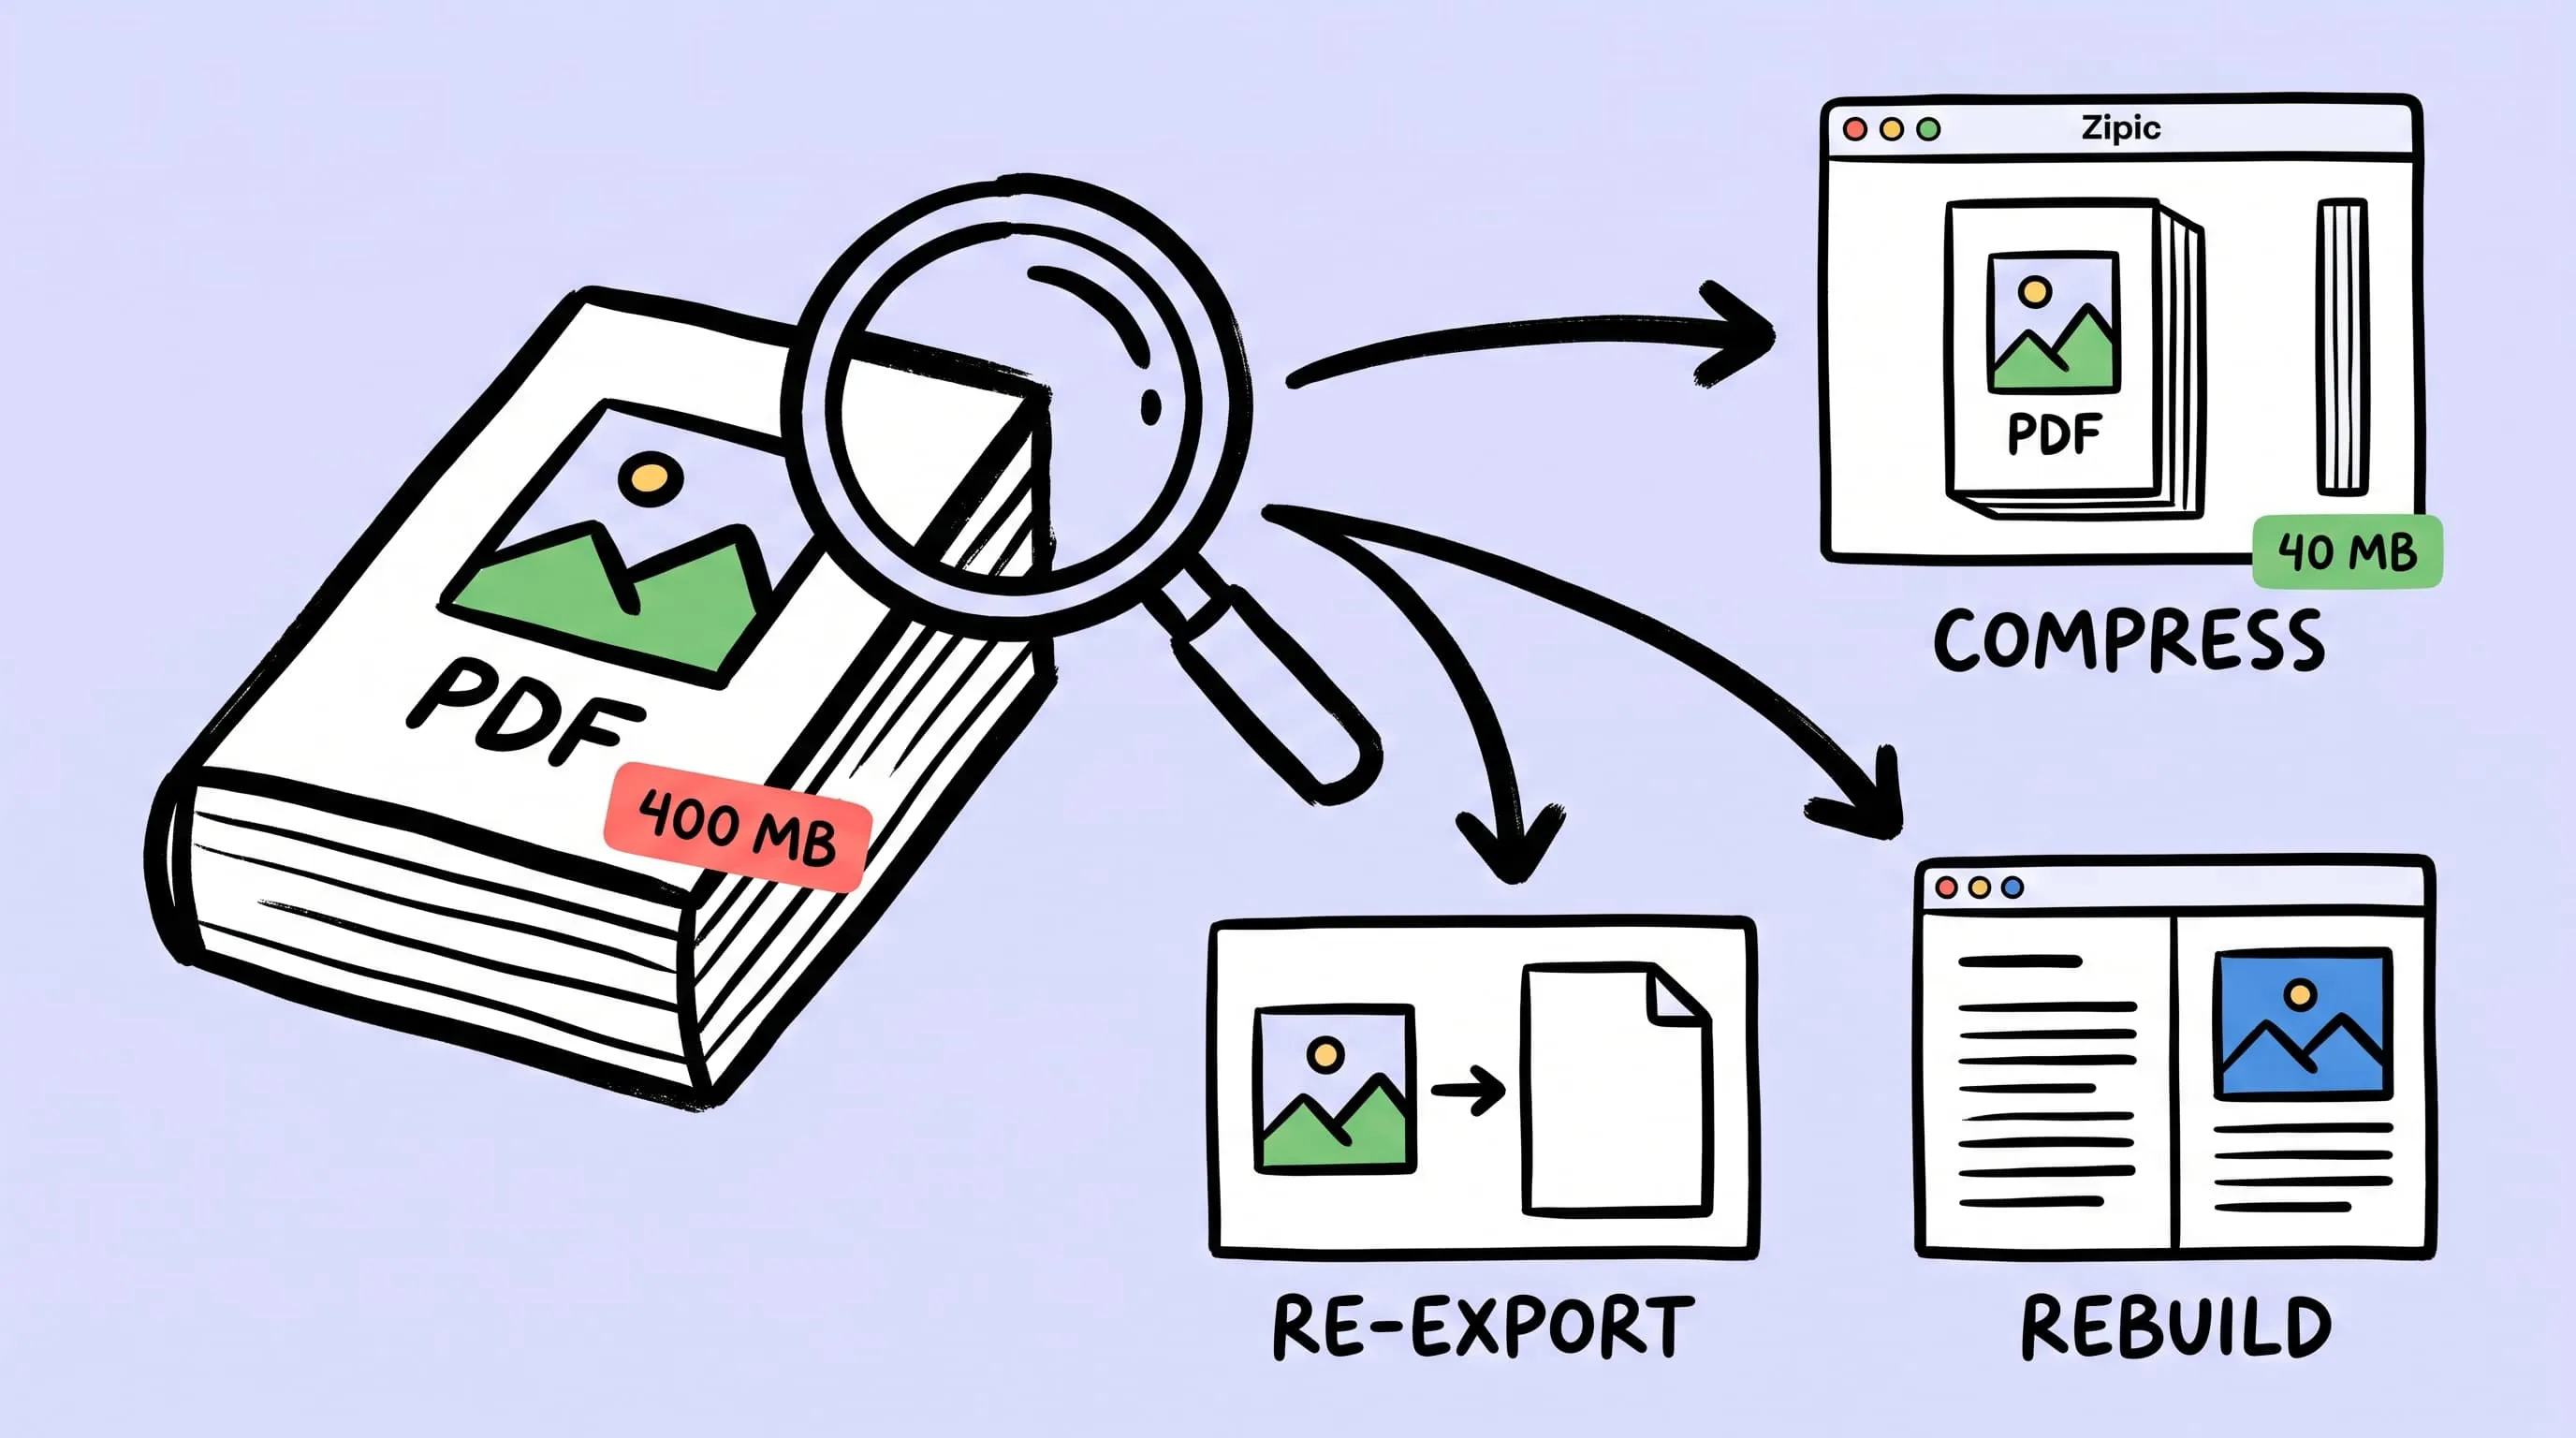
Compress a PDF Without Losing Quality: Diagnose It First
Learn how to compress a PDF without losing quality by diagnosing oversized images, export settings, and layout problems before choosing a compression level.
pngoptim Deep Dive: Zipic's PNG Compression Engine for Mac
See how Zipic uses pngoptim for Mac PNG compression: stable presets, APNG handling, ICNS workflow, and predictable batch results for teams.